
How to add a member
Create a team login, pick a role, and send the invite. Members can only use stores they're given access to.
Adding members requires Pro, and only the owner or an admin can do it. This example adds Bob as a member.
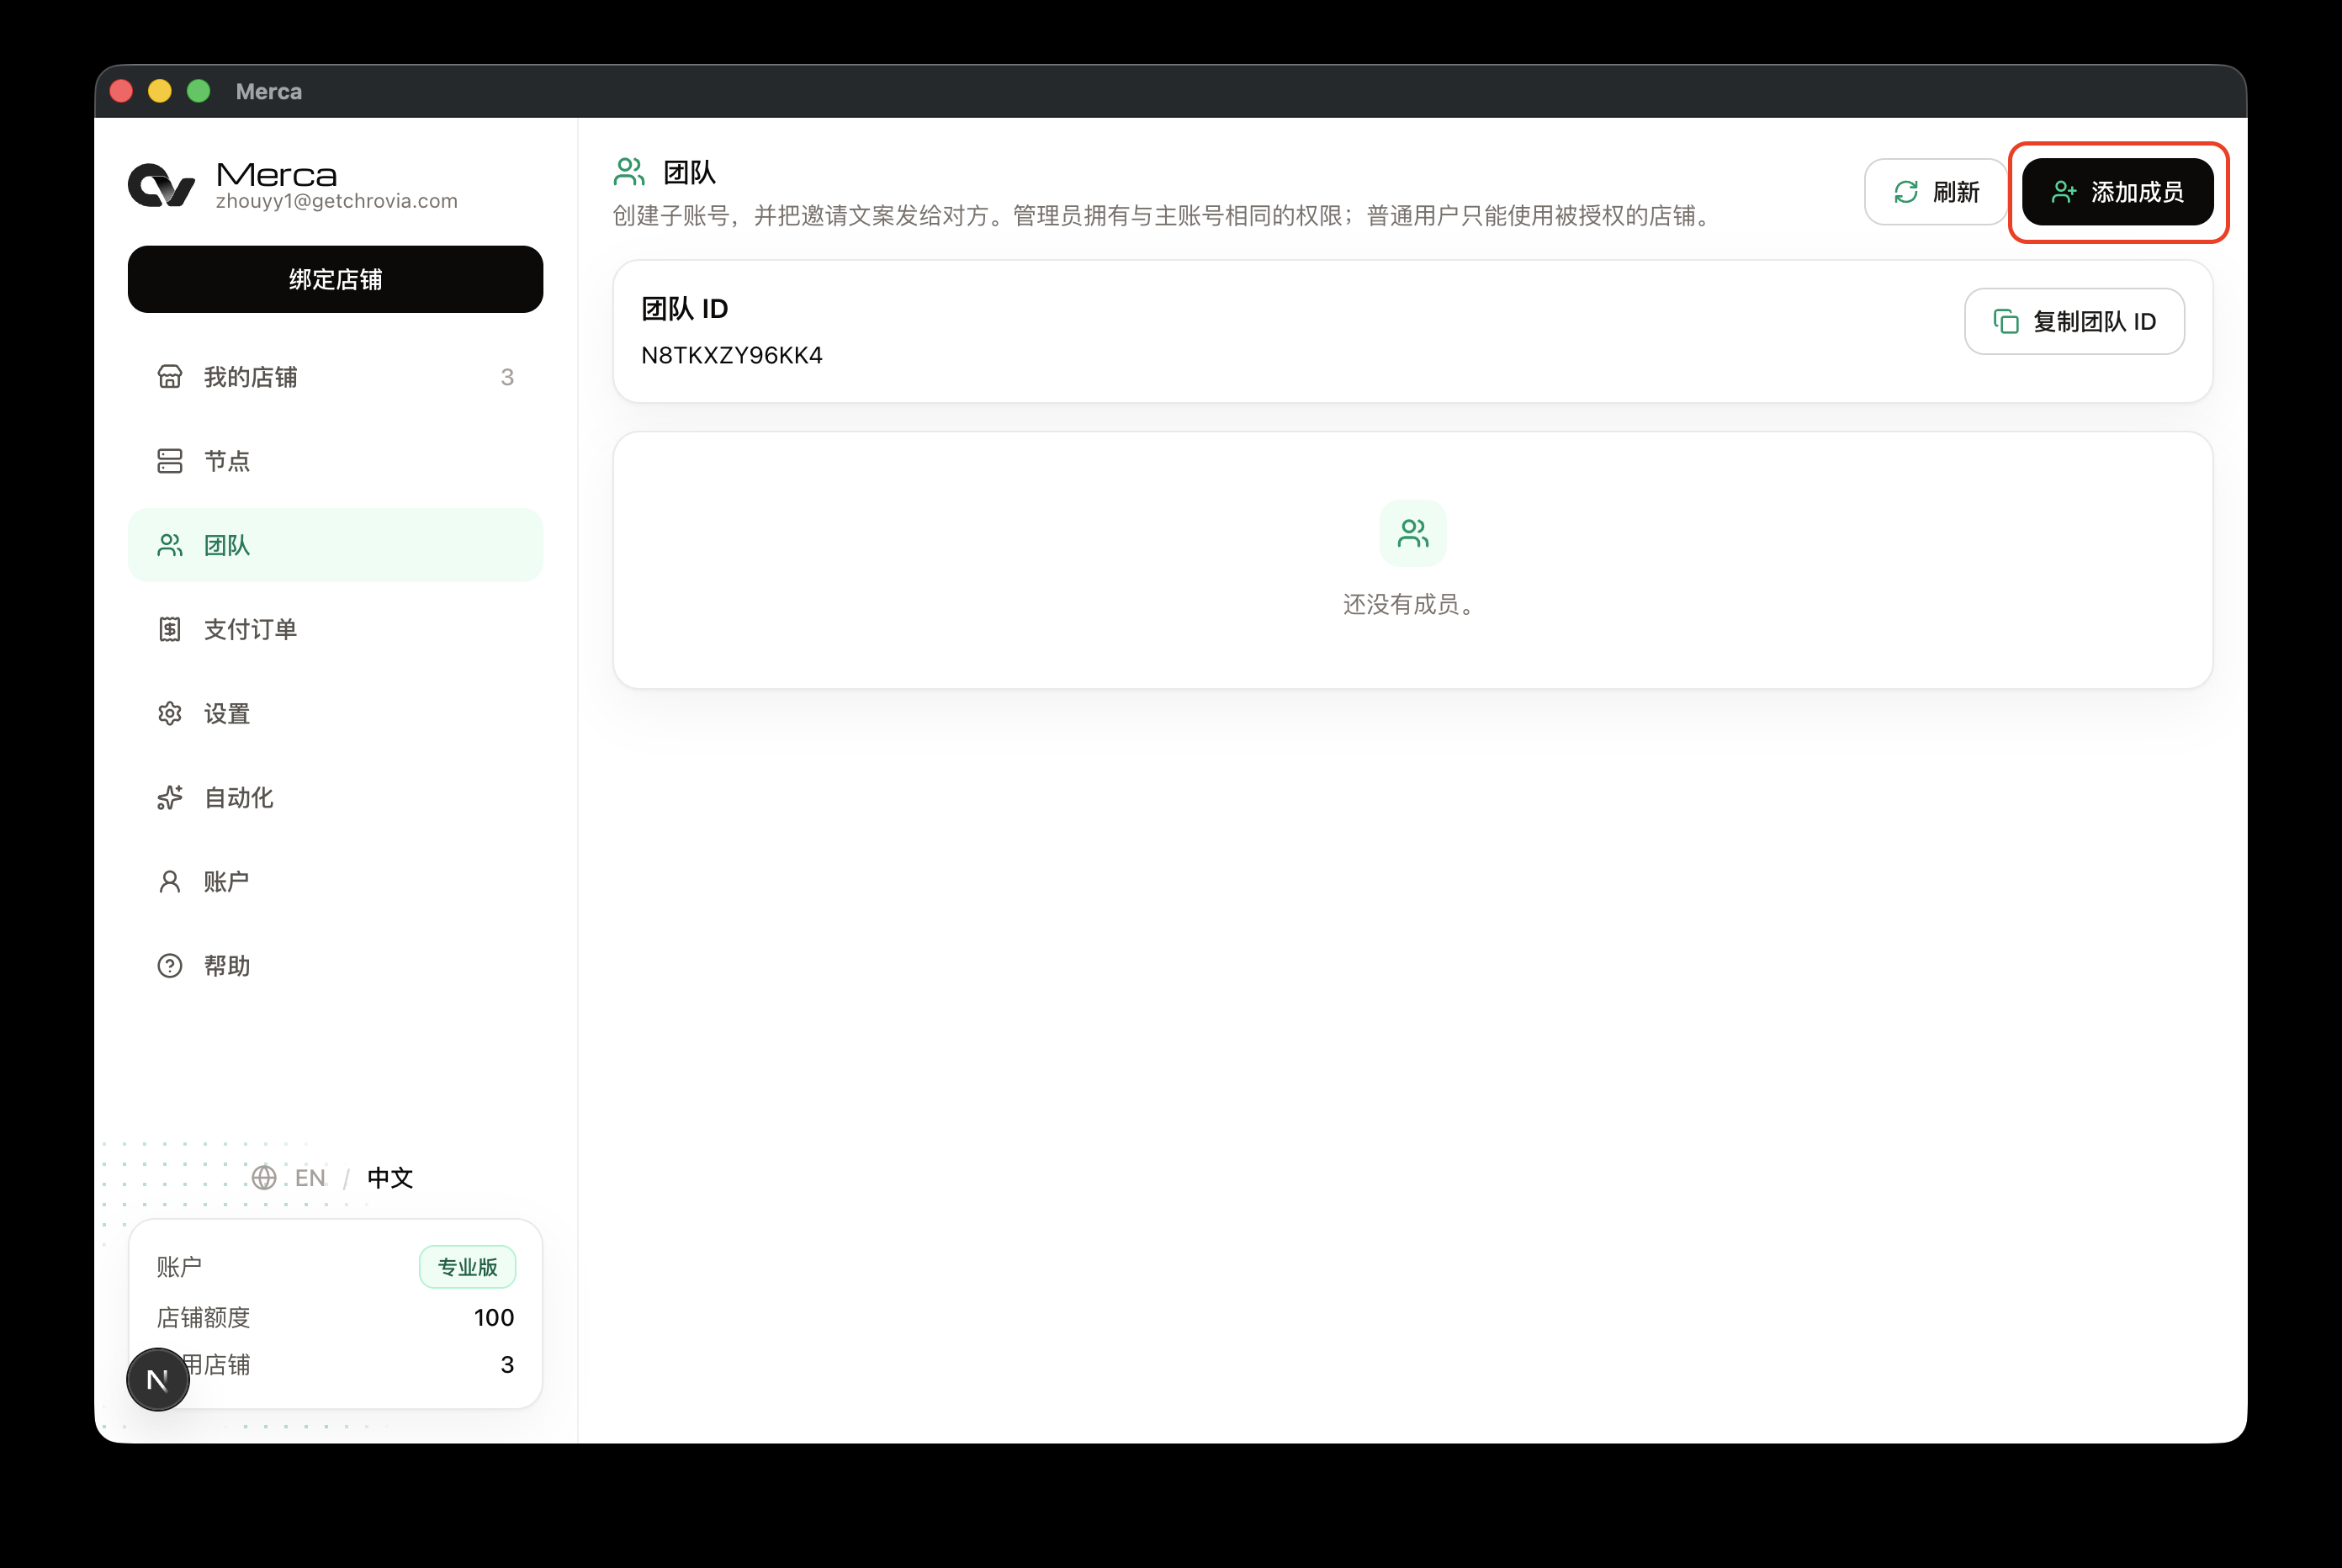
Open Add member
- Open the Merca desktop app, sign in as the owner or an admin, and go to Team.
- Click Add member at the top right.
Enter the member details
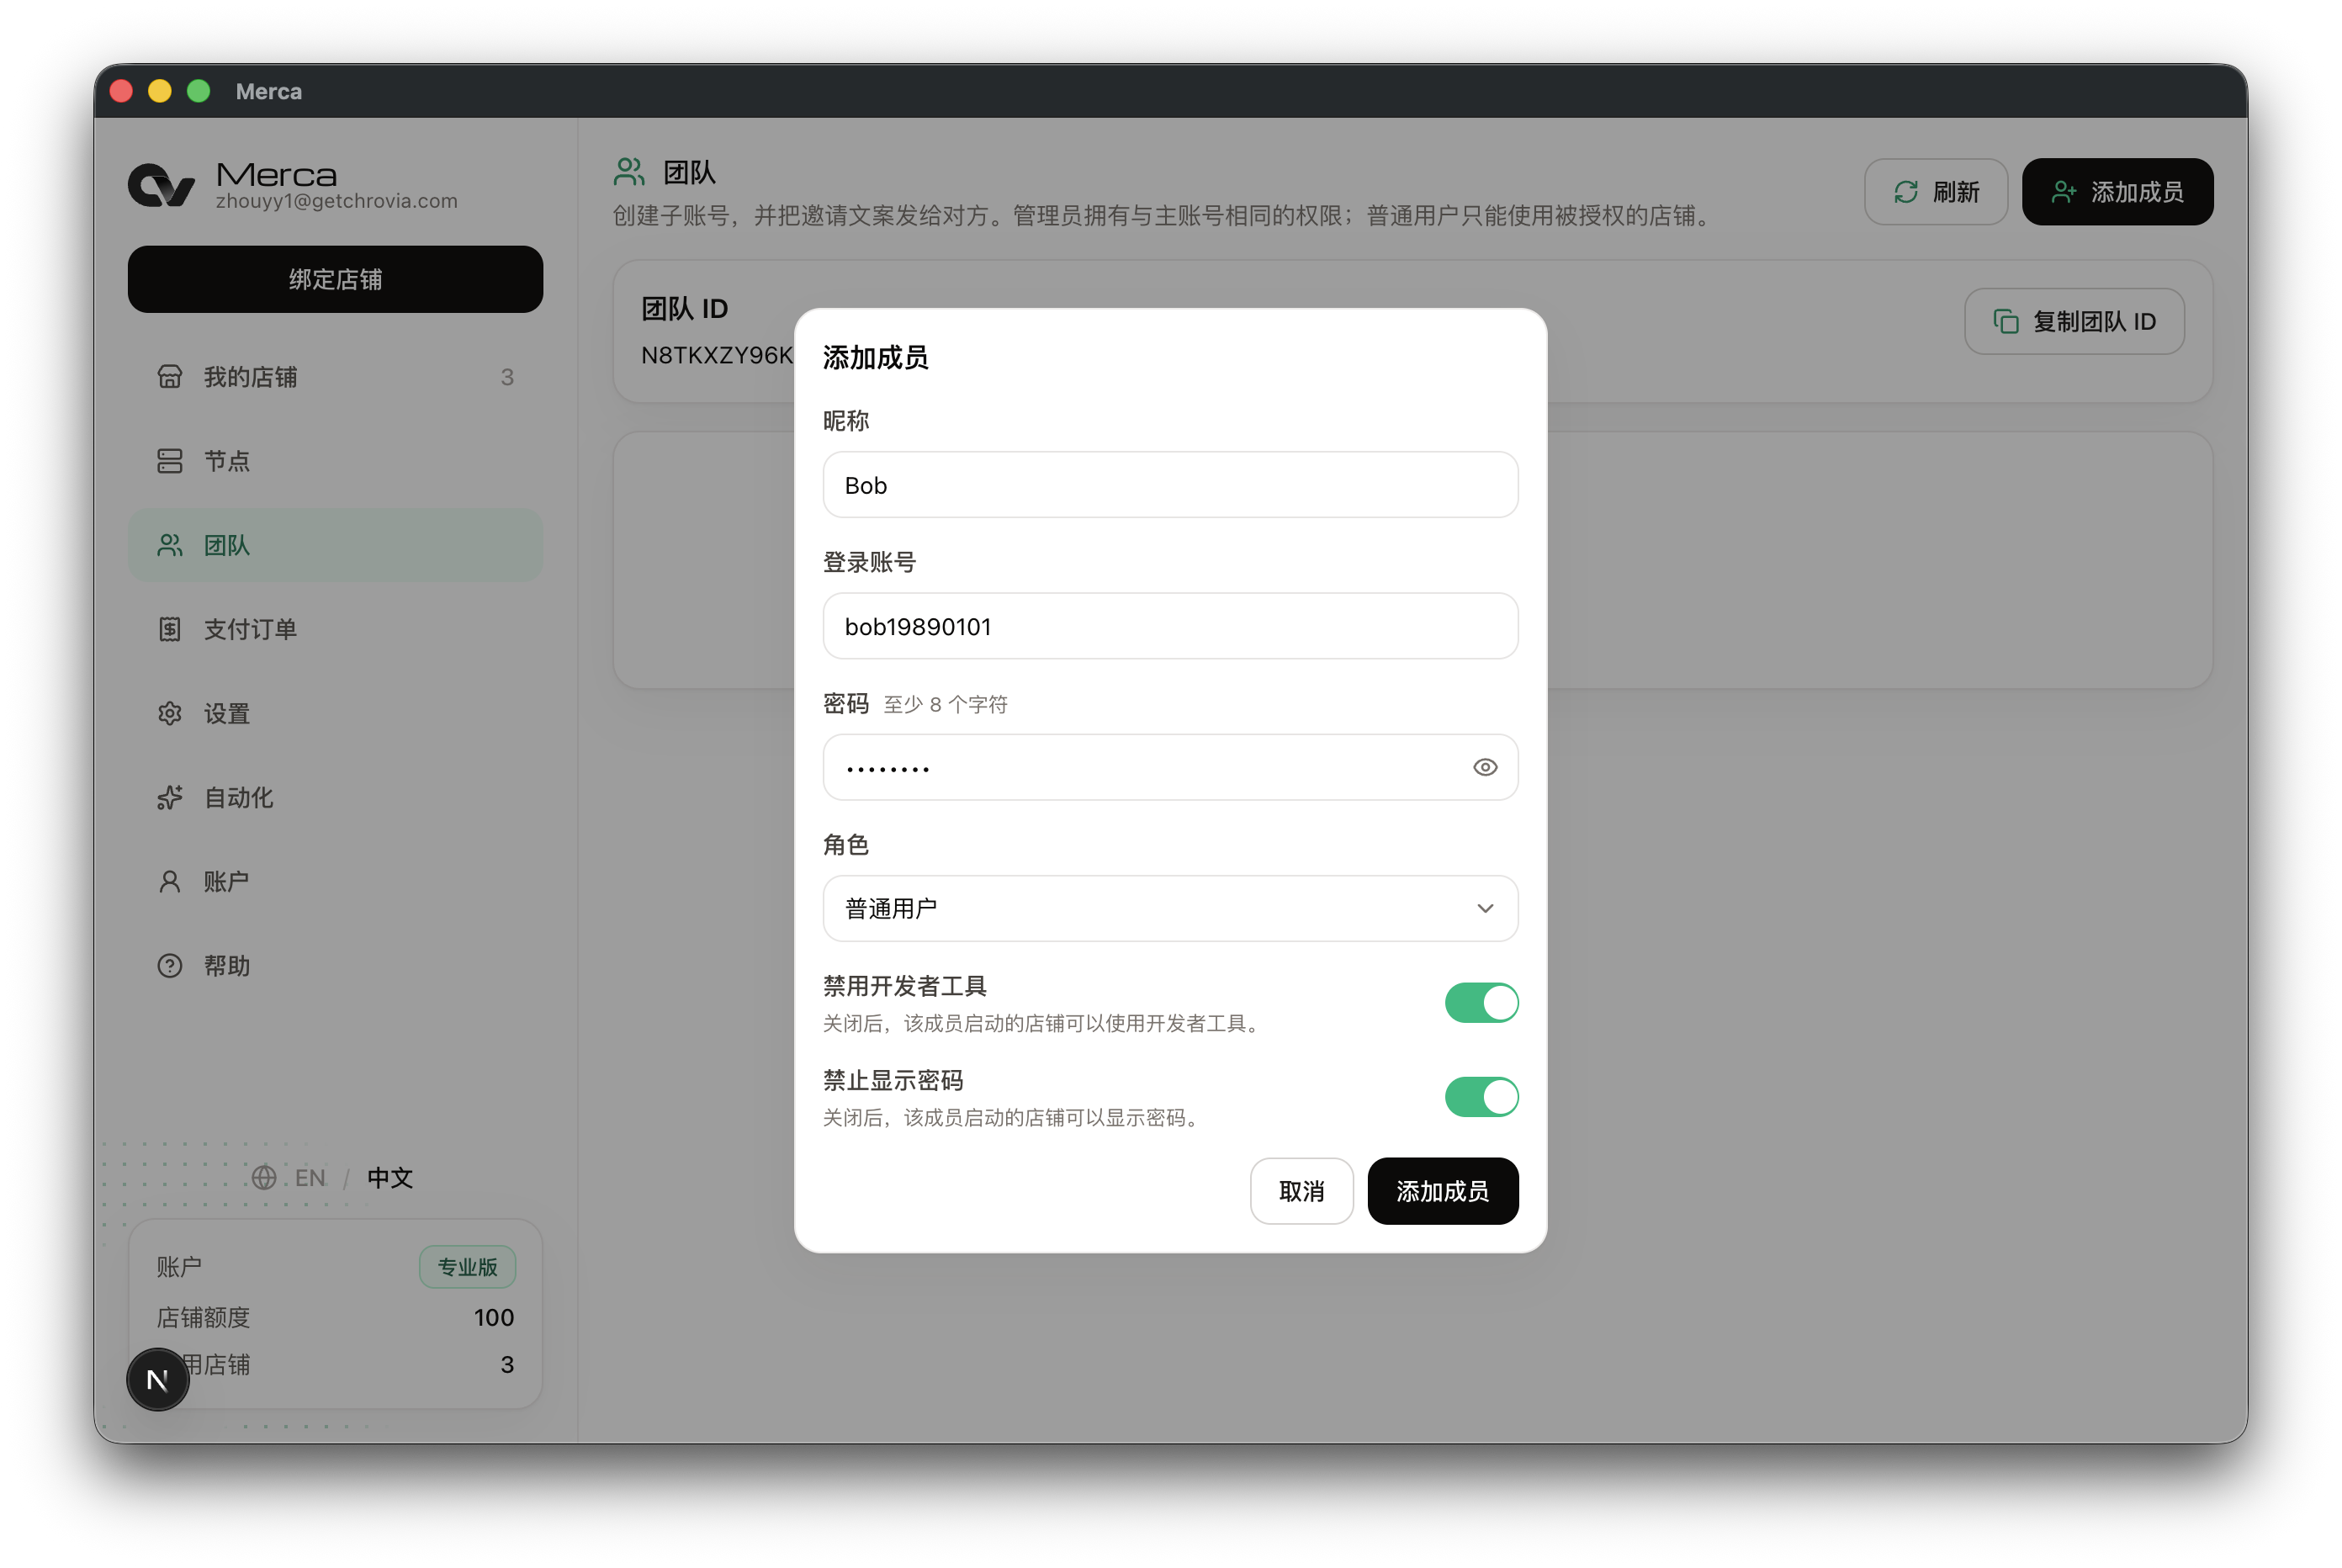
Enter a Nickname, Login account, and Password. The password must be at least 8 characters. This example uses nickname Bob and login account bob19890101.
Set Role to Member or Admin. The default is Member.
Disable DevTools and Hide passwords are checked by default. When they are checked, stores this member launches can't use DevTools and can't show passwords. Uncheck them only if you need those.
Click Add member.
Roles
The Owner is the email account that registered. You can't add it here. The owner can manage every store, node, and the team, and can also open Transactions and manage billing.
An Admin can add, edit, and delete stores, manage nodes and the team, and add members. They don't see Transactions and can't change billing. They see every store and don't need per-store access.
A Member can only use stores they're given access to. The sidebar has no Nodes, Team, Transactions, or Automation, and no Add store. Until you grant access, My stores is empty.
When you grant a member access to a store, pick one of:
- Read-only: they can launch the store, view its details, and view Authenticator, Passkeys, and Additional accounts.
- Full access: they can also change that store's settings, and change Additional accounts, Authenticator, and Passkeys. They can't delete the store or grant access to someone else.
Copy the invite
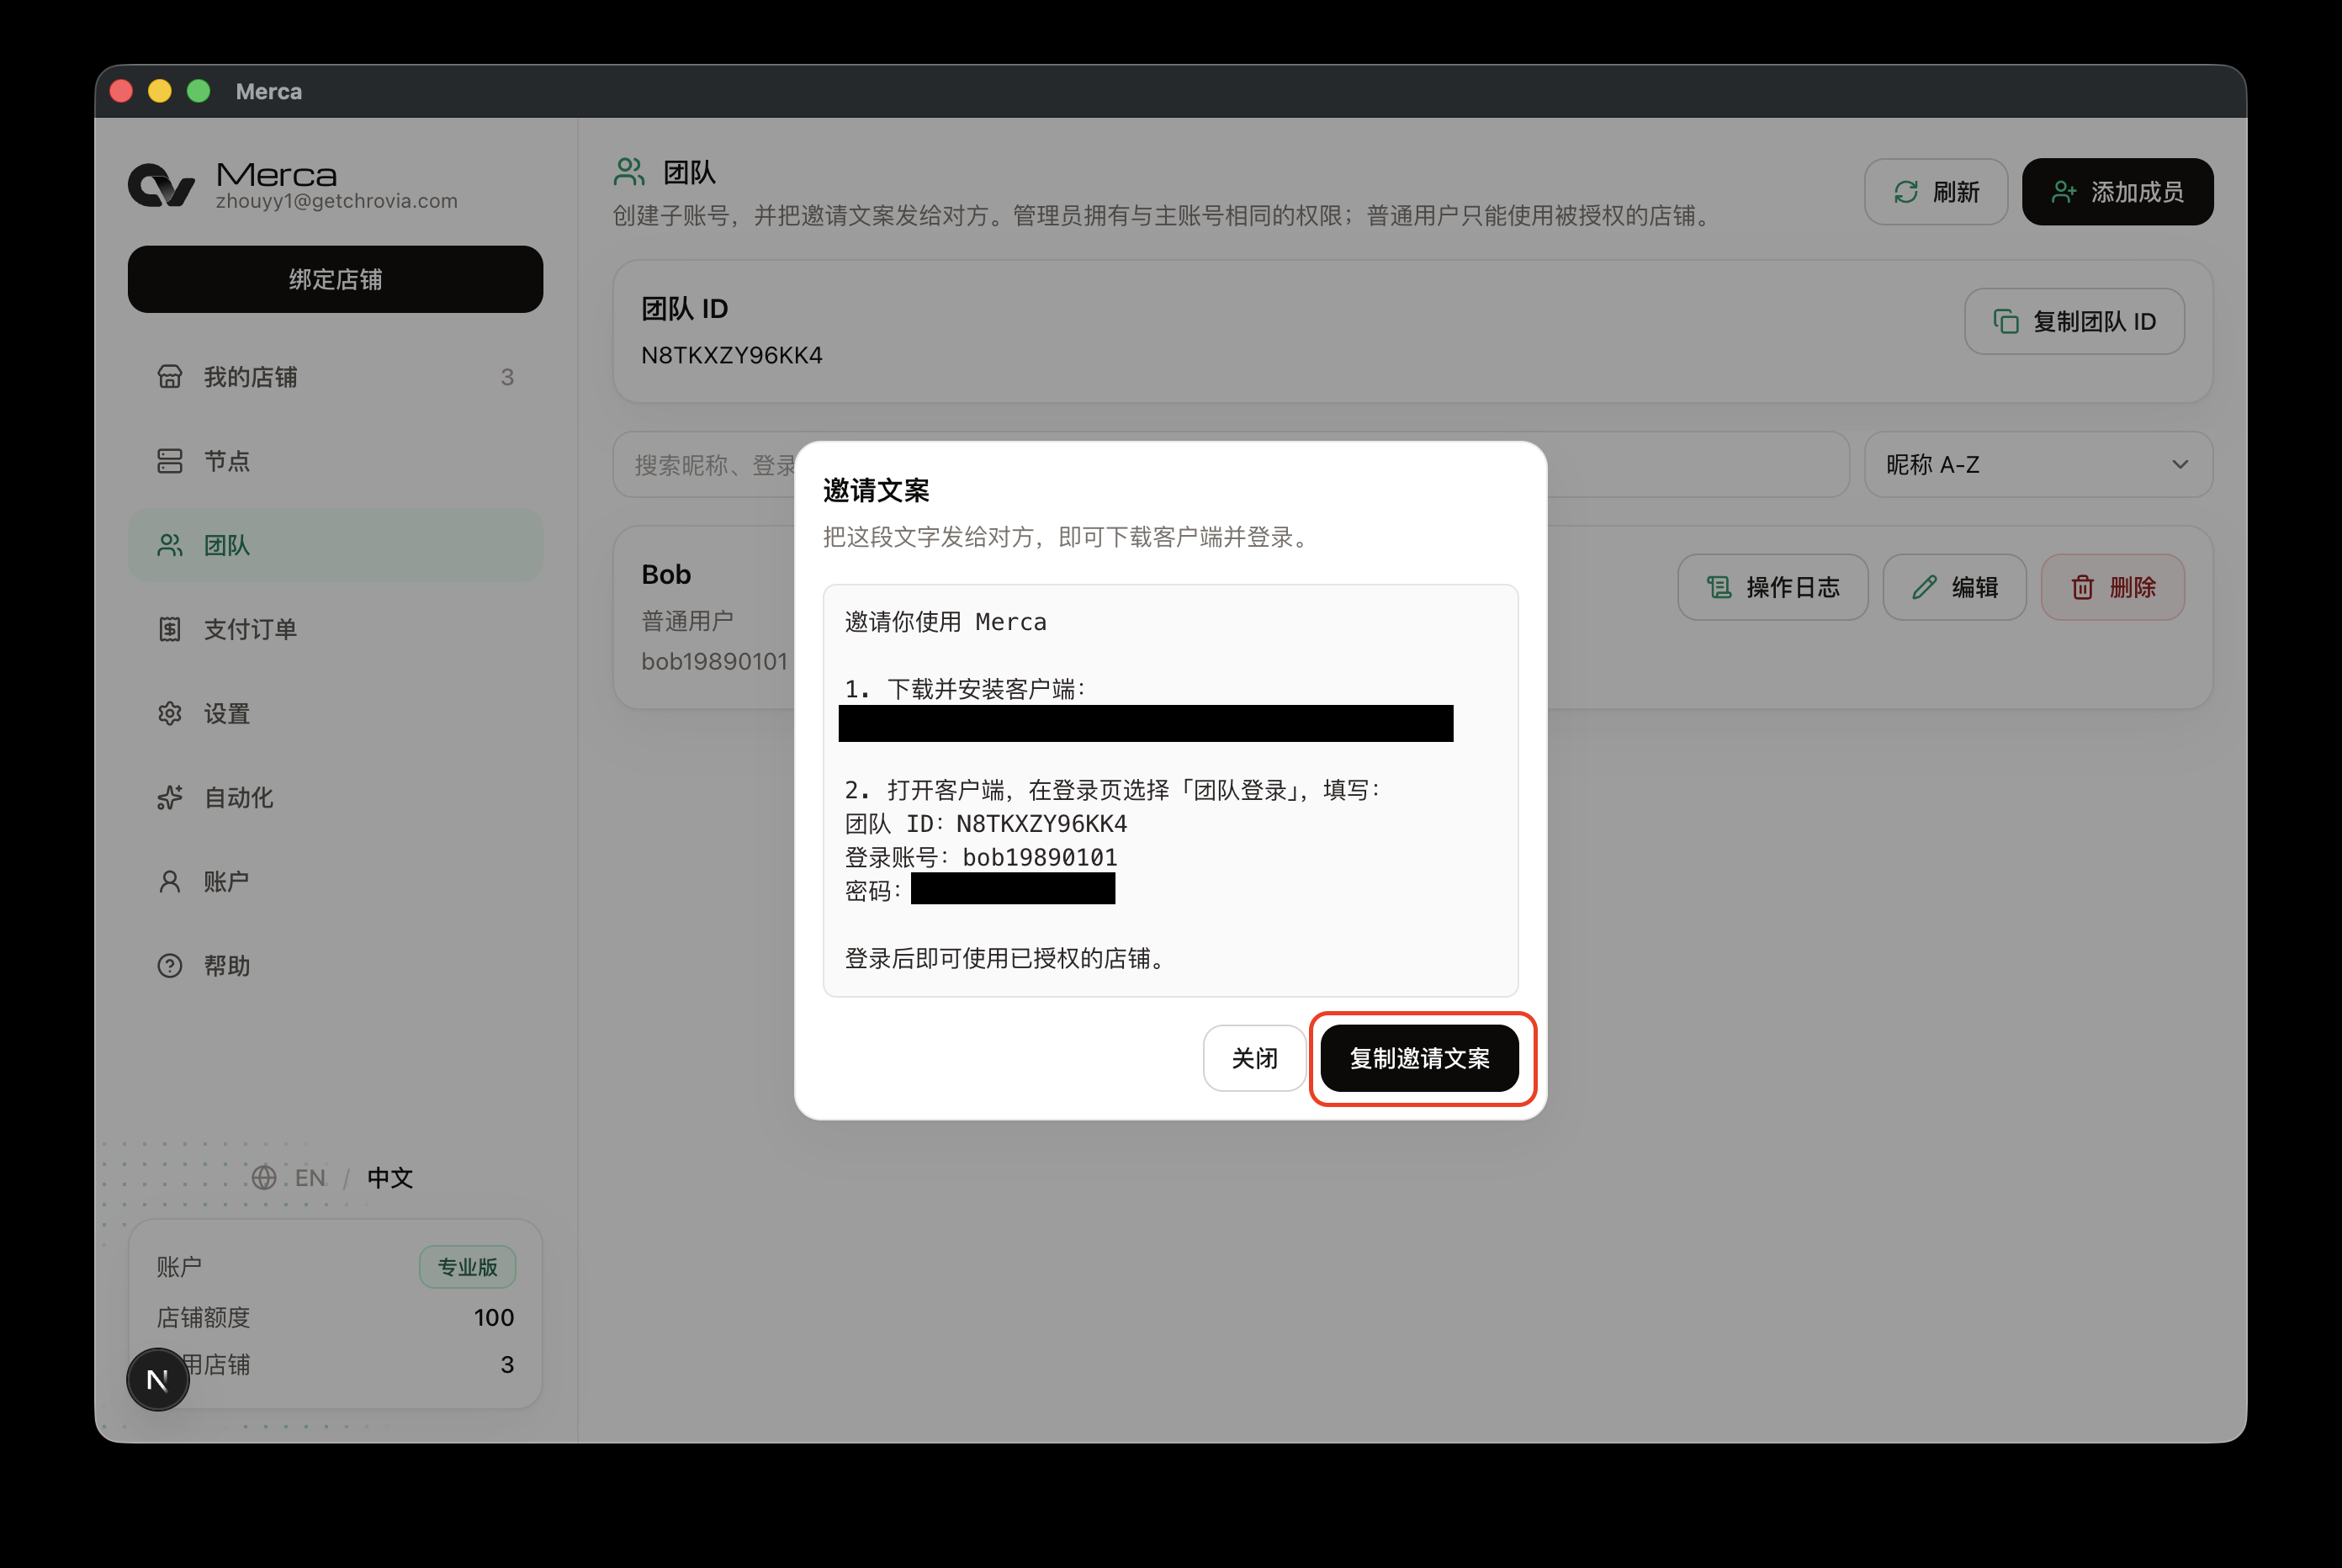
After you add the member, Invite opens. Click Copy invite and send it to them. It has the download link, team ID, login account, and the initial password.
Give a member store access
Admins skip this step. A member only sees stores you've assigned.
- Sign in as the owner or an admin and open My stores.
- Click Assign access on the store they should use.
- Find the member, set access to Read-only or Full access, then click Save access.
For the full flow, see How to assign stores to a member. If you don't have a store yet, see How to add a store.
They sign in with a team account
They open the client and click Sign in with a team account. Don't sign in with email, and don't Create account.
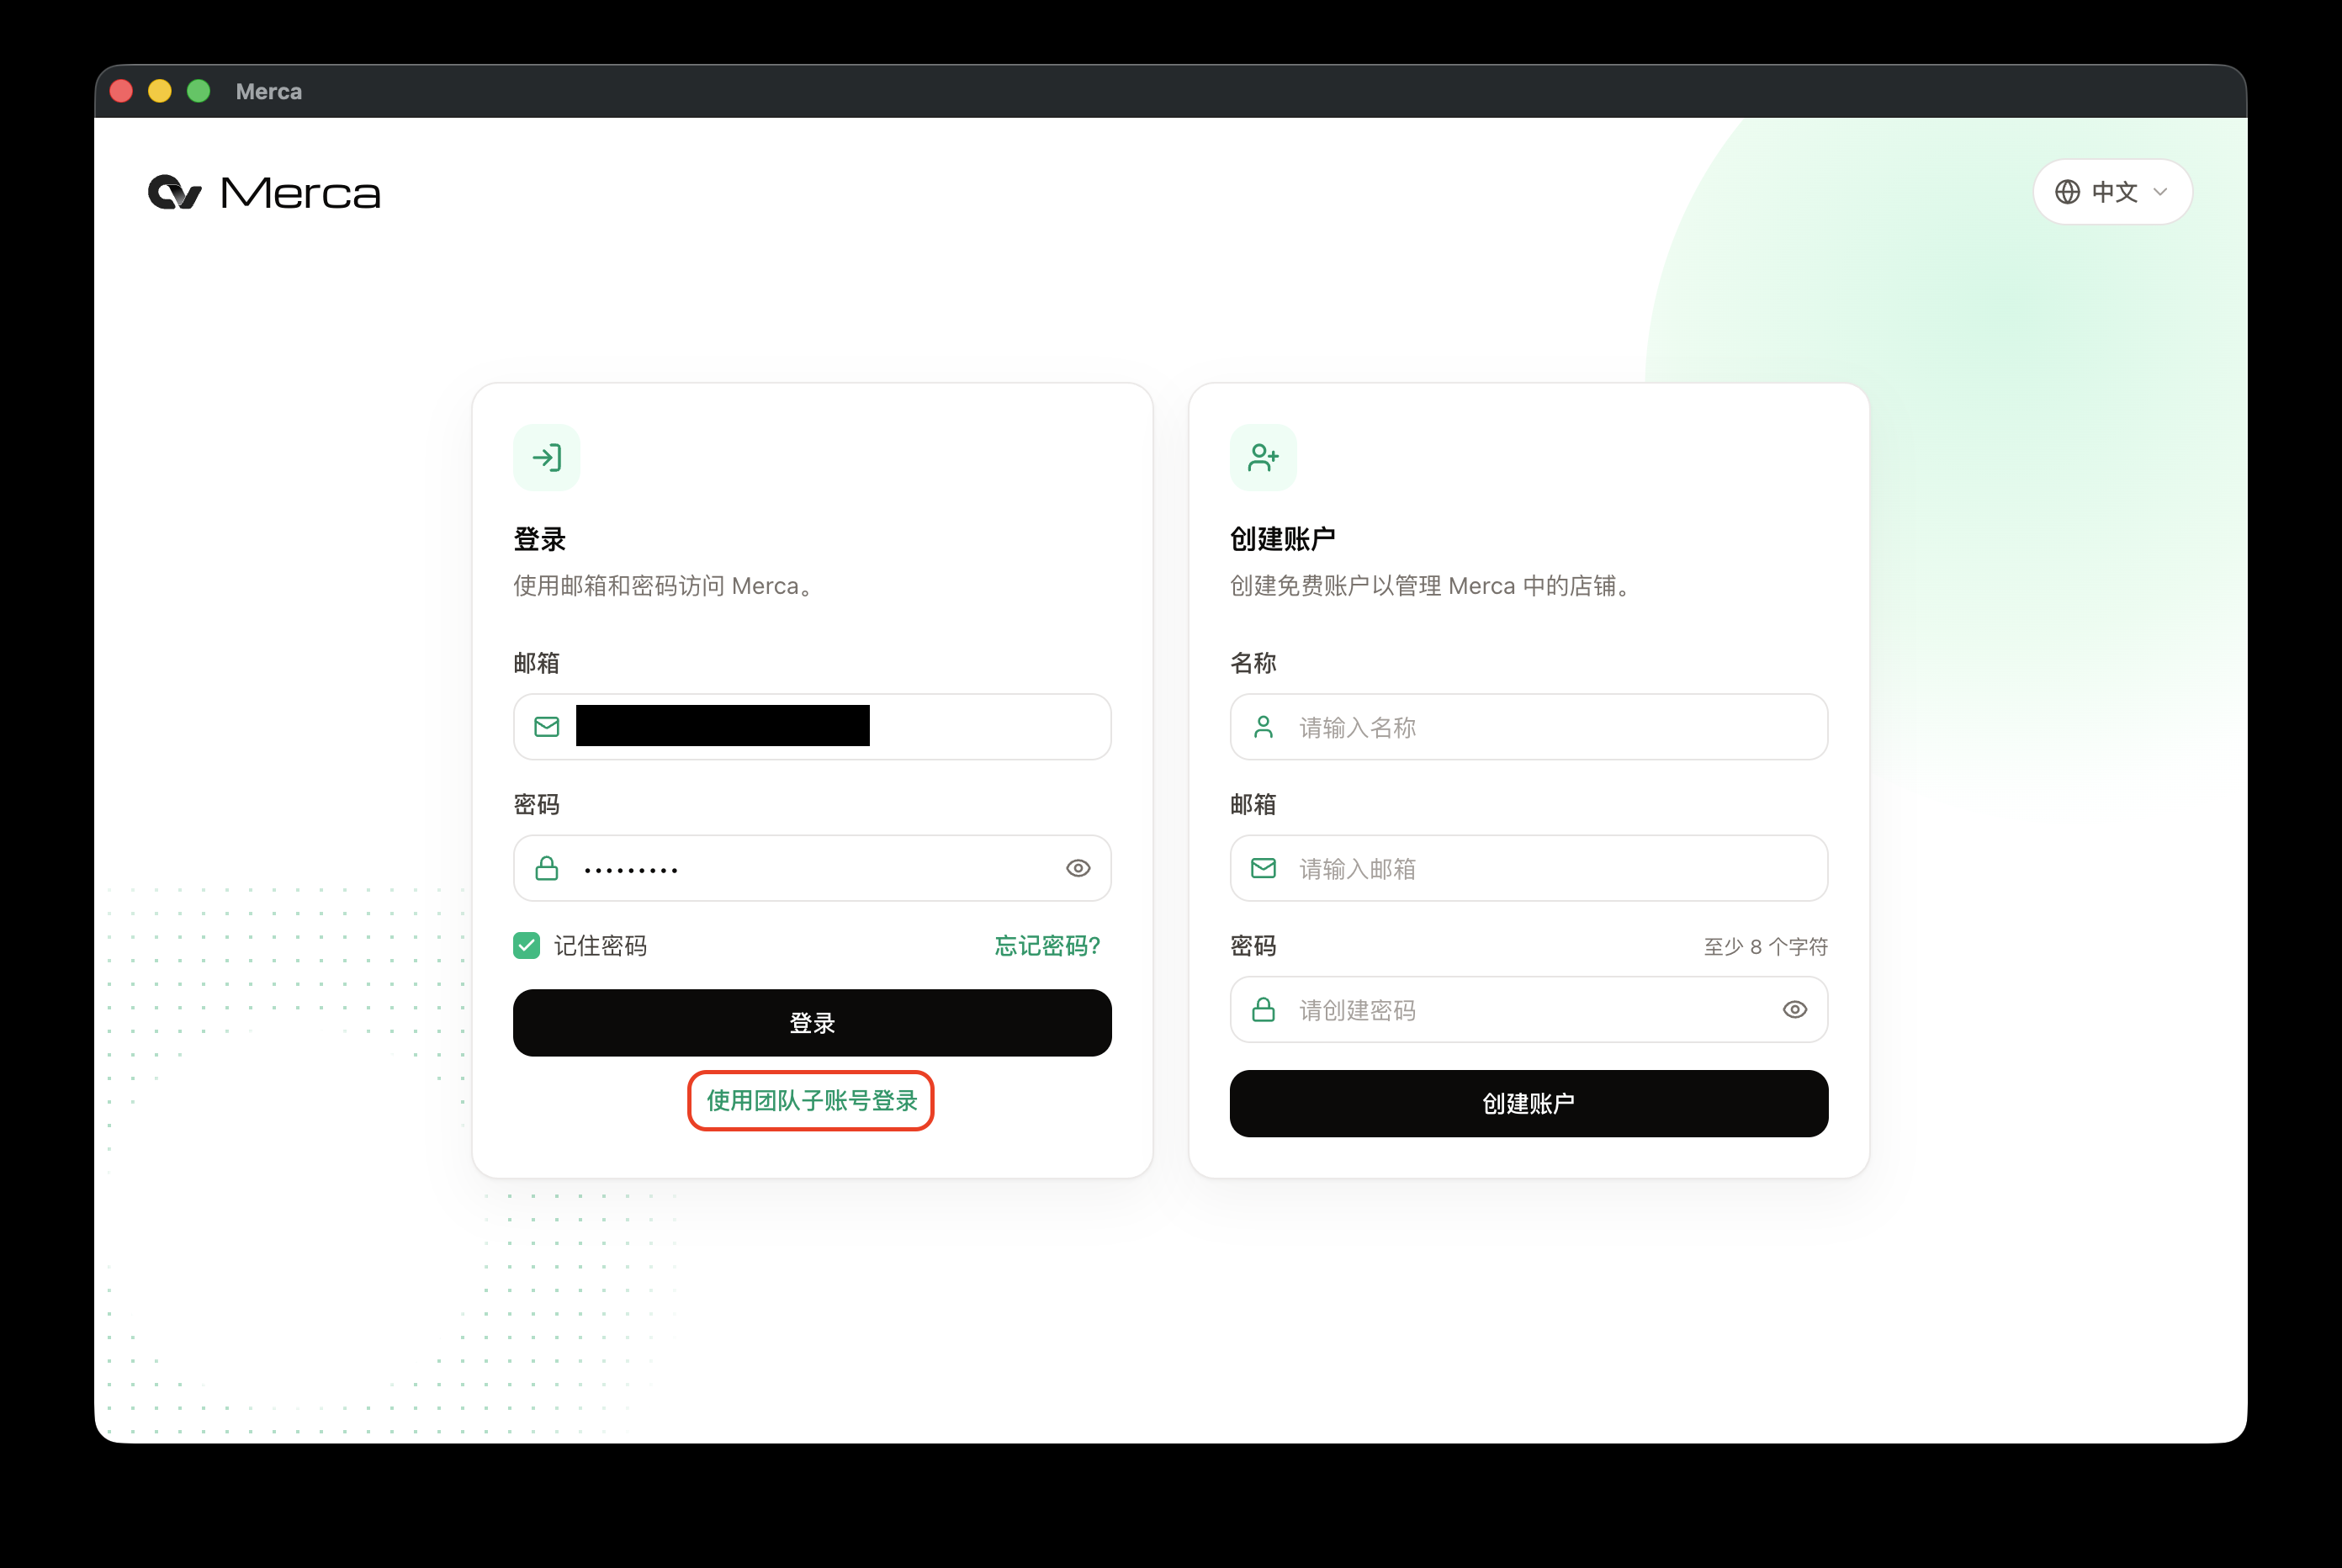
Enter the Team ID, Login account, and Password from the invite, then click Sign in.
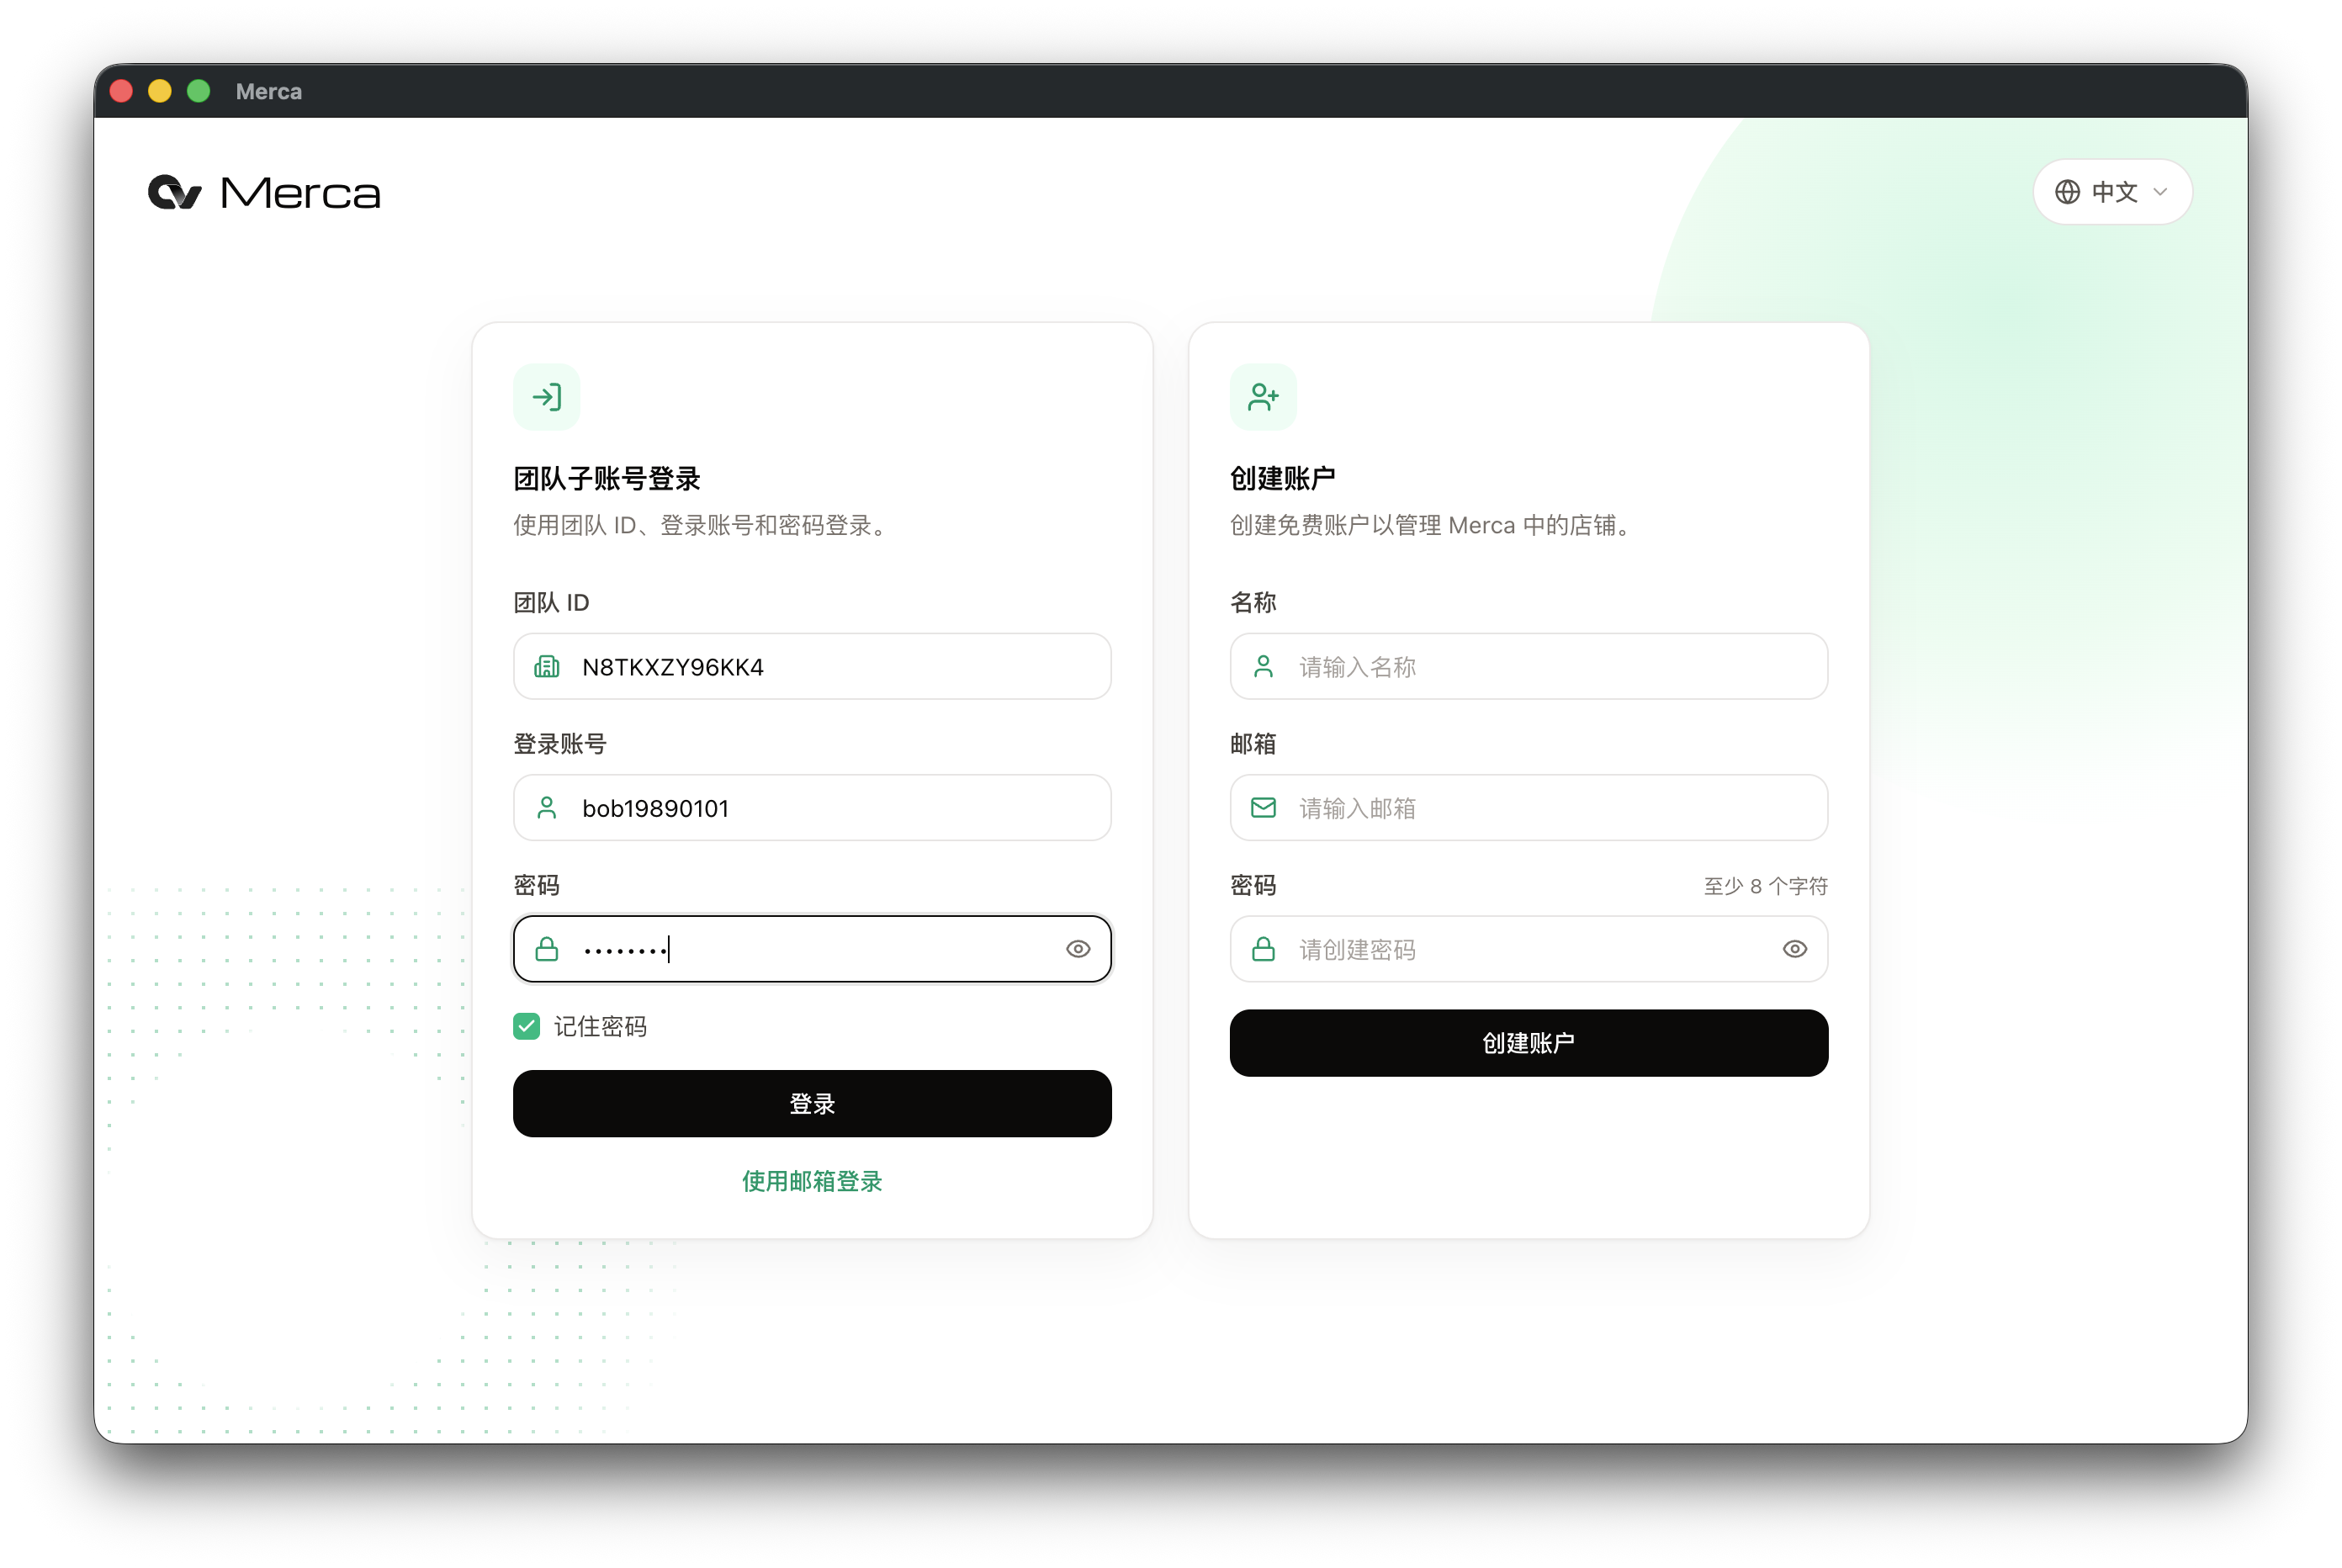
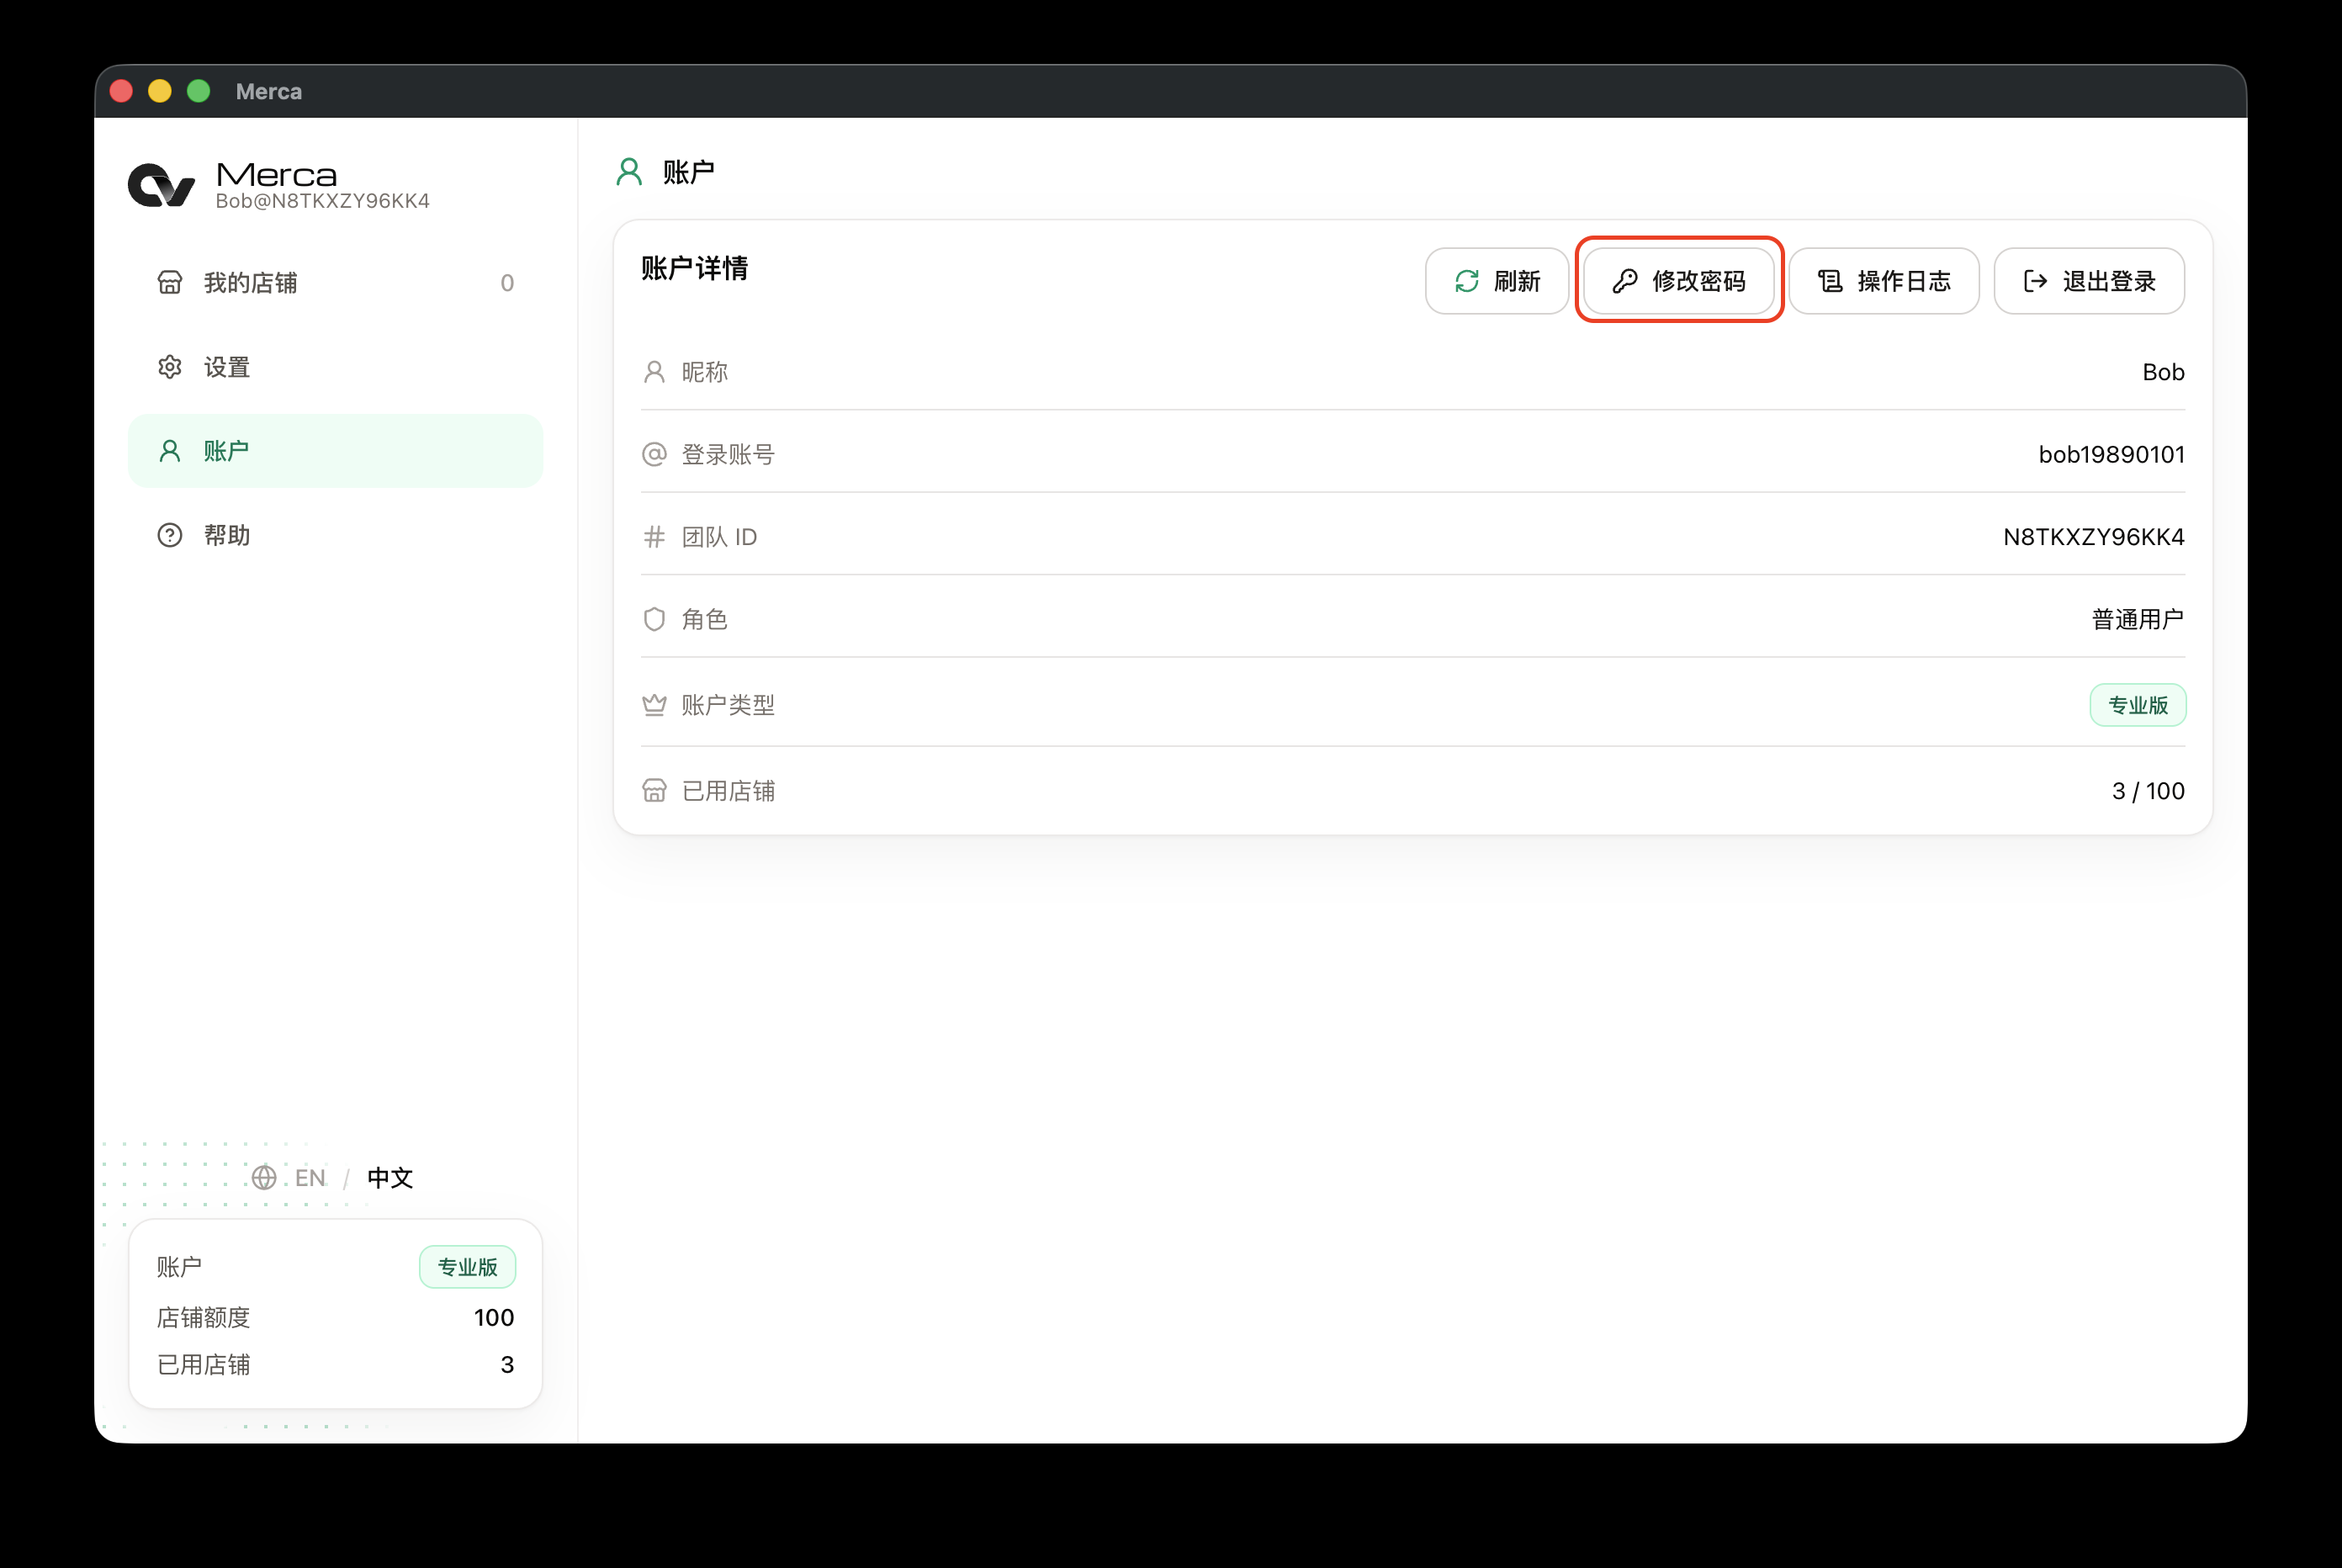
Change the password after sign-in
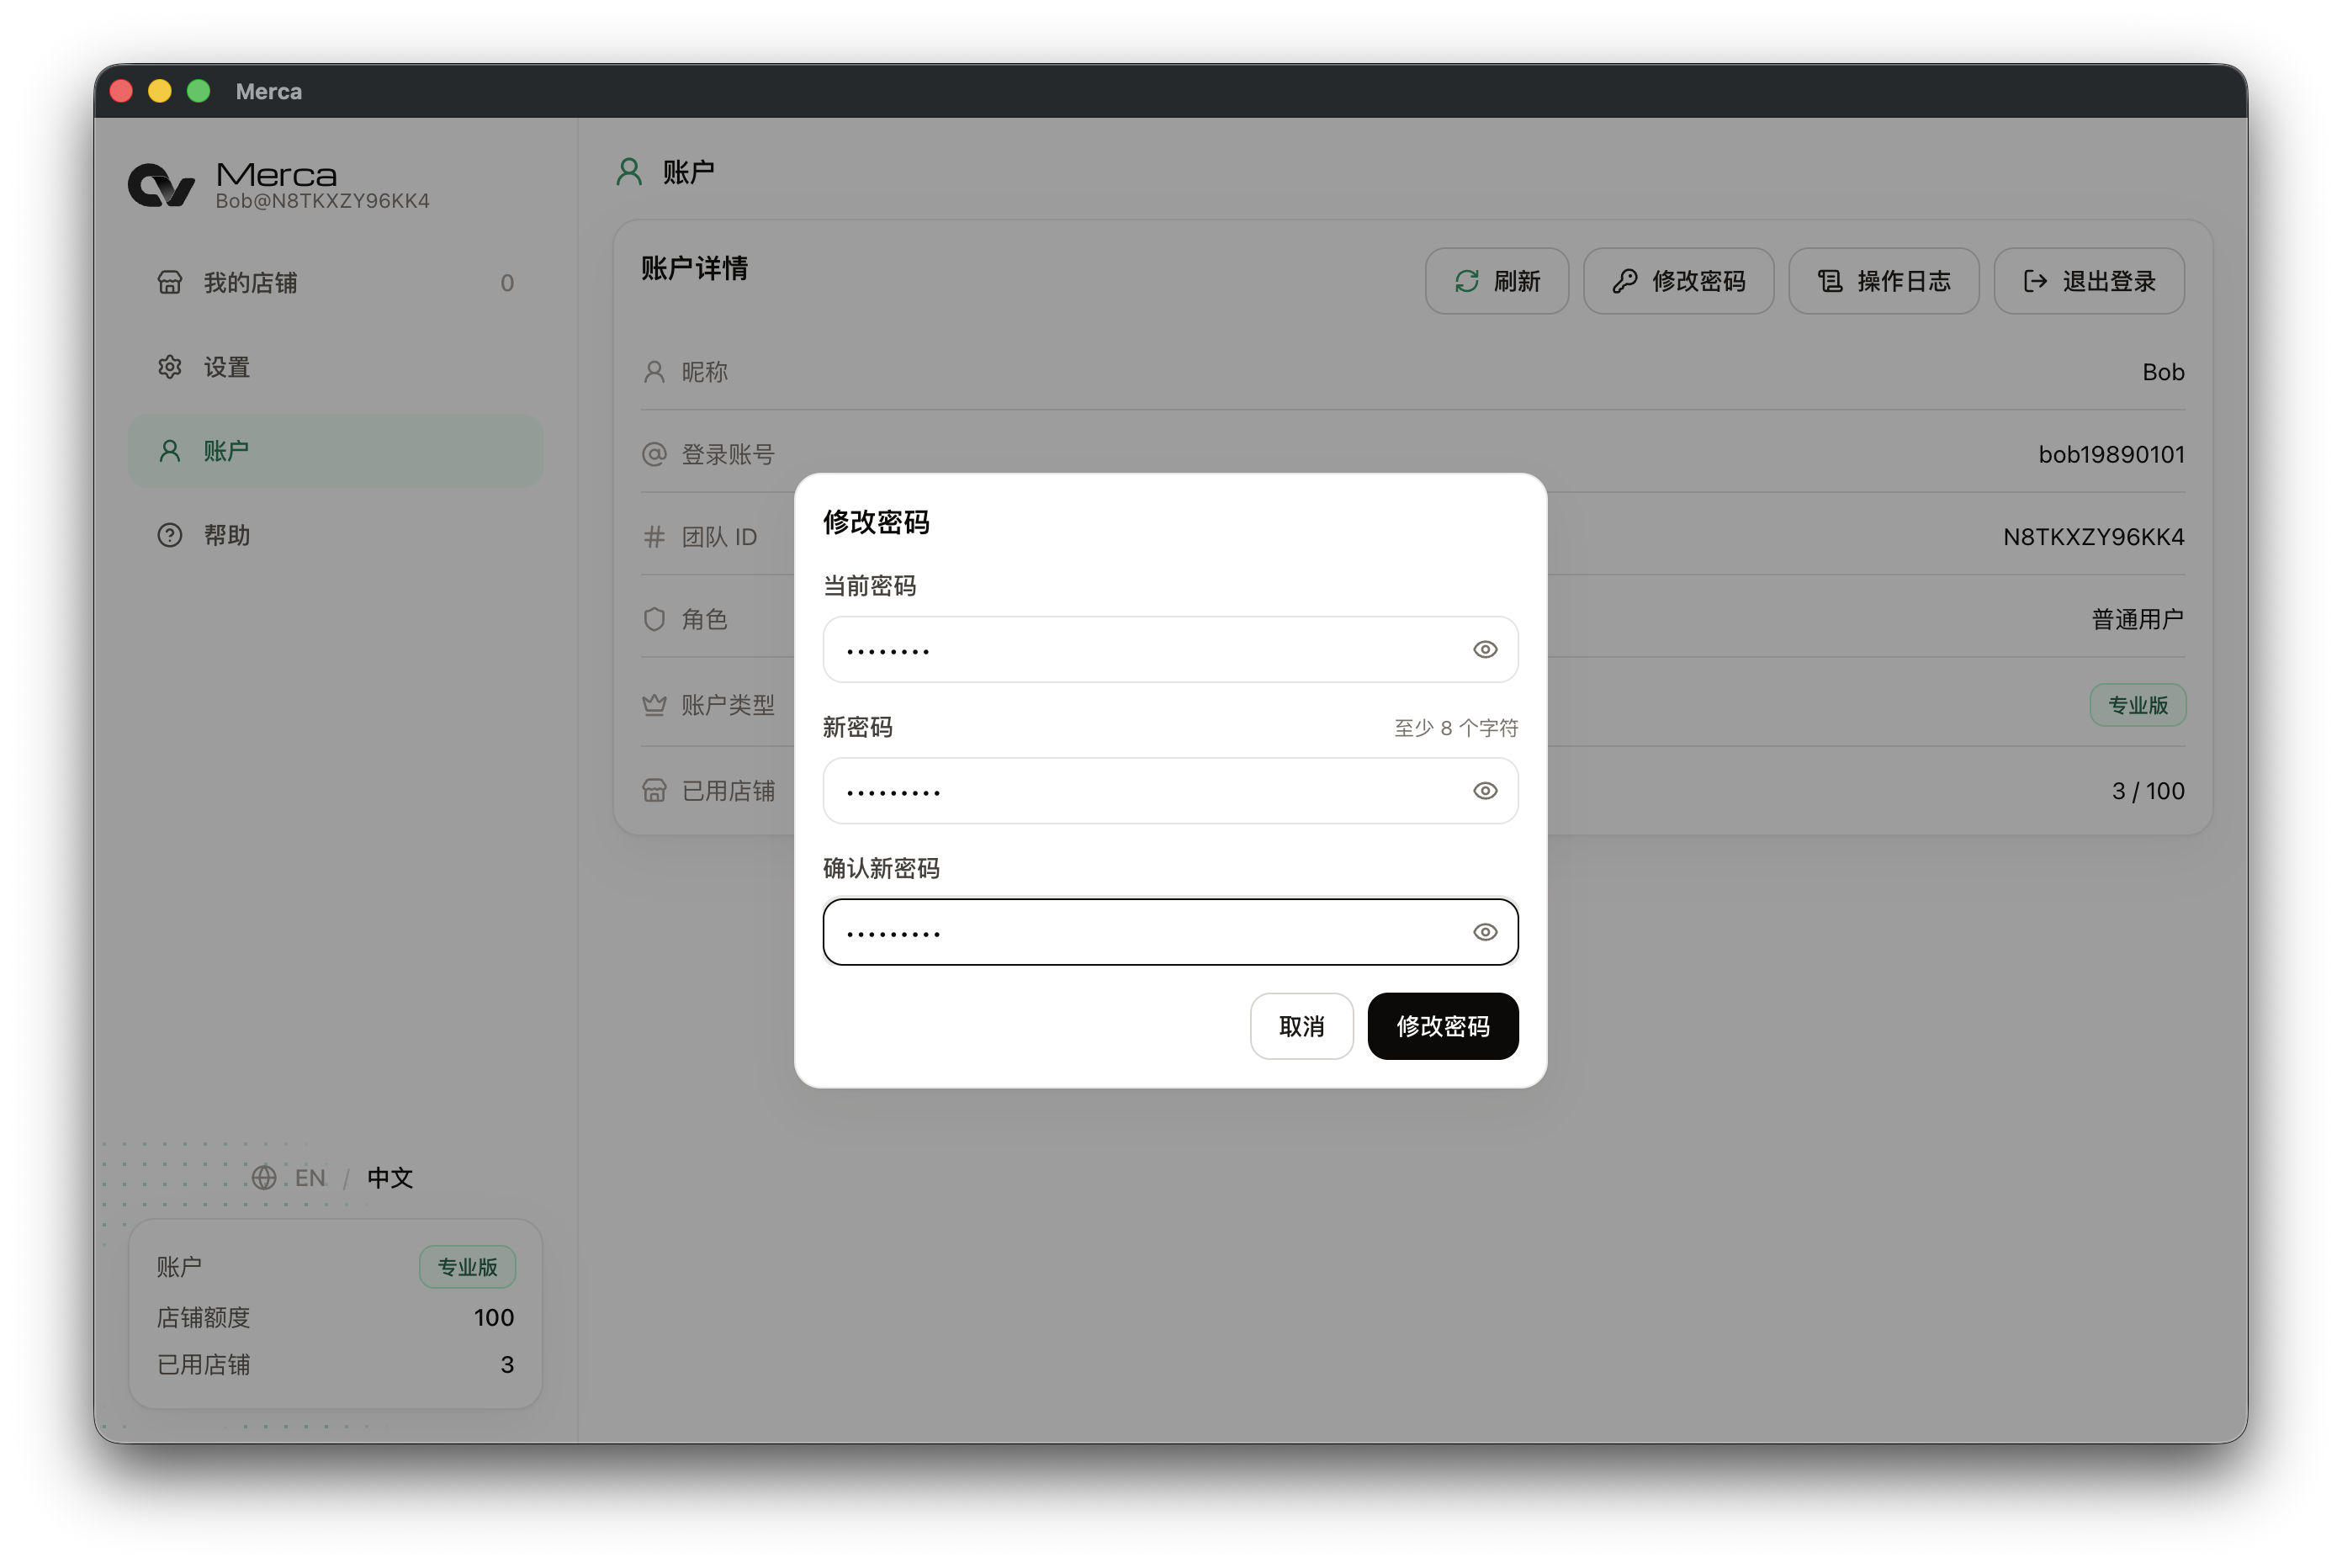
After they sign in, they open Account. Click Change password and replace the password from the invite.
Enter Current password, New password, and Confirm new password, then click Change password. The current password is the one in the invite.
To give a service provider a temporary account and take it back later, see How to give a service provider a temporary account. To check a member's sign-ins, store launches, or store edits, open that member's Activity log. See How to view the activity log.