
Set up an Amazon Passkey with Merca VPS
Register a Passkey in Amazon seller settings, choose Merca VPS Passkeys, and export a backup.
Install and open the browser first: Install Merca VPS. Sign in to Amazon Seller Central in Merca VPS. Do not do this step in another browser.
Open Passkey settings
In Amazon Seller Central, open the Passkey settings page.
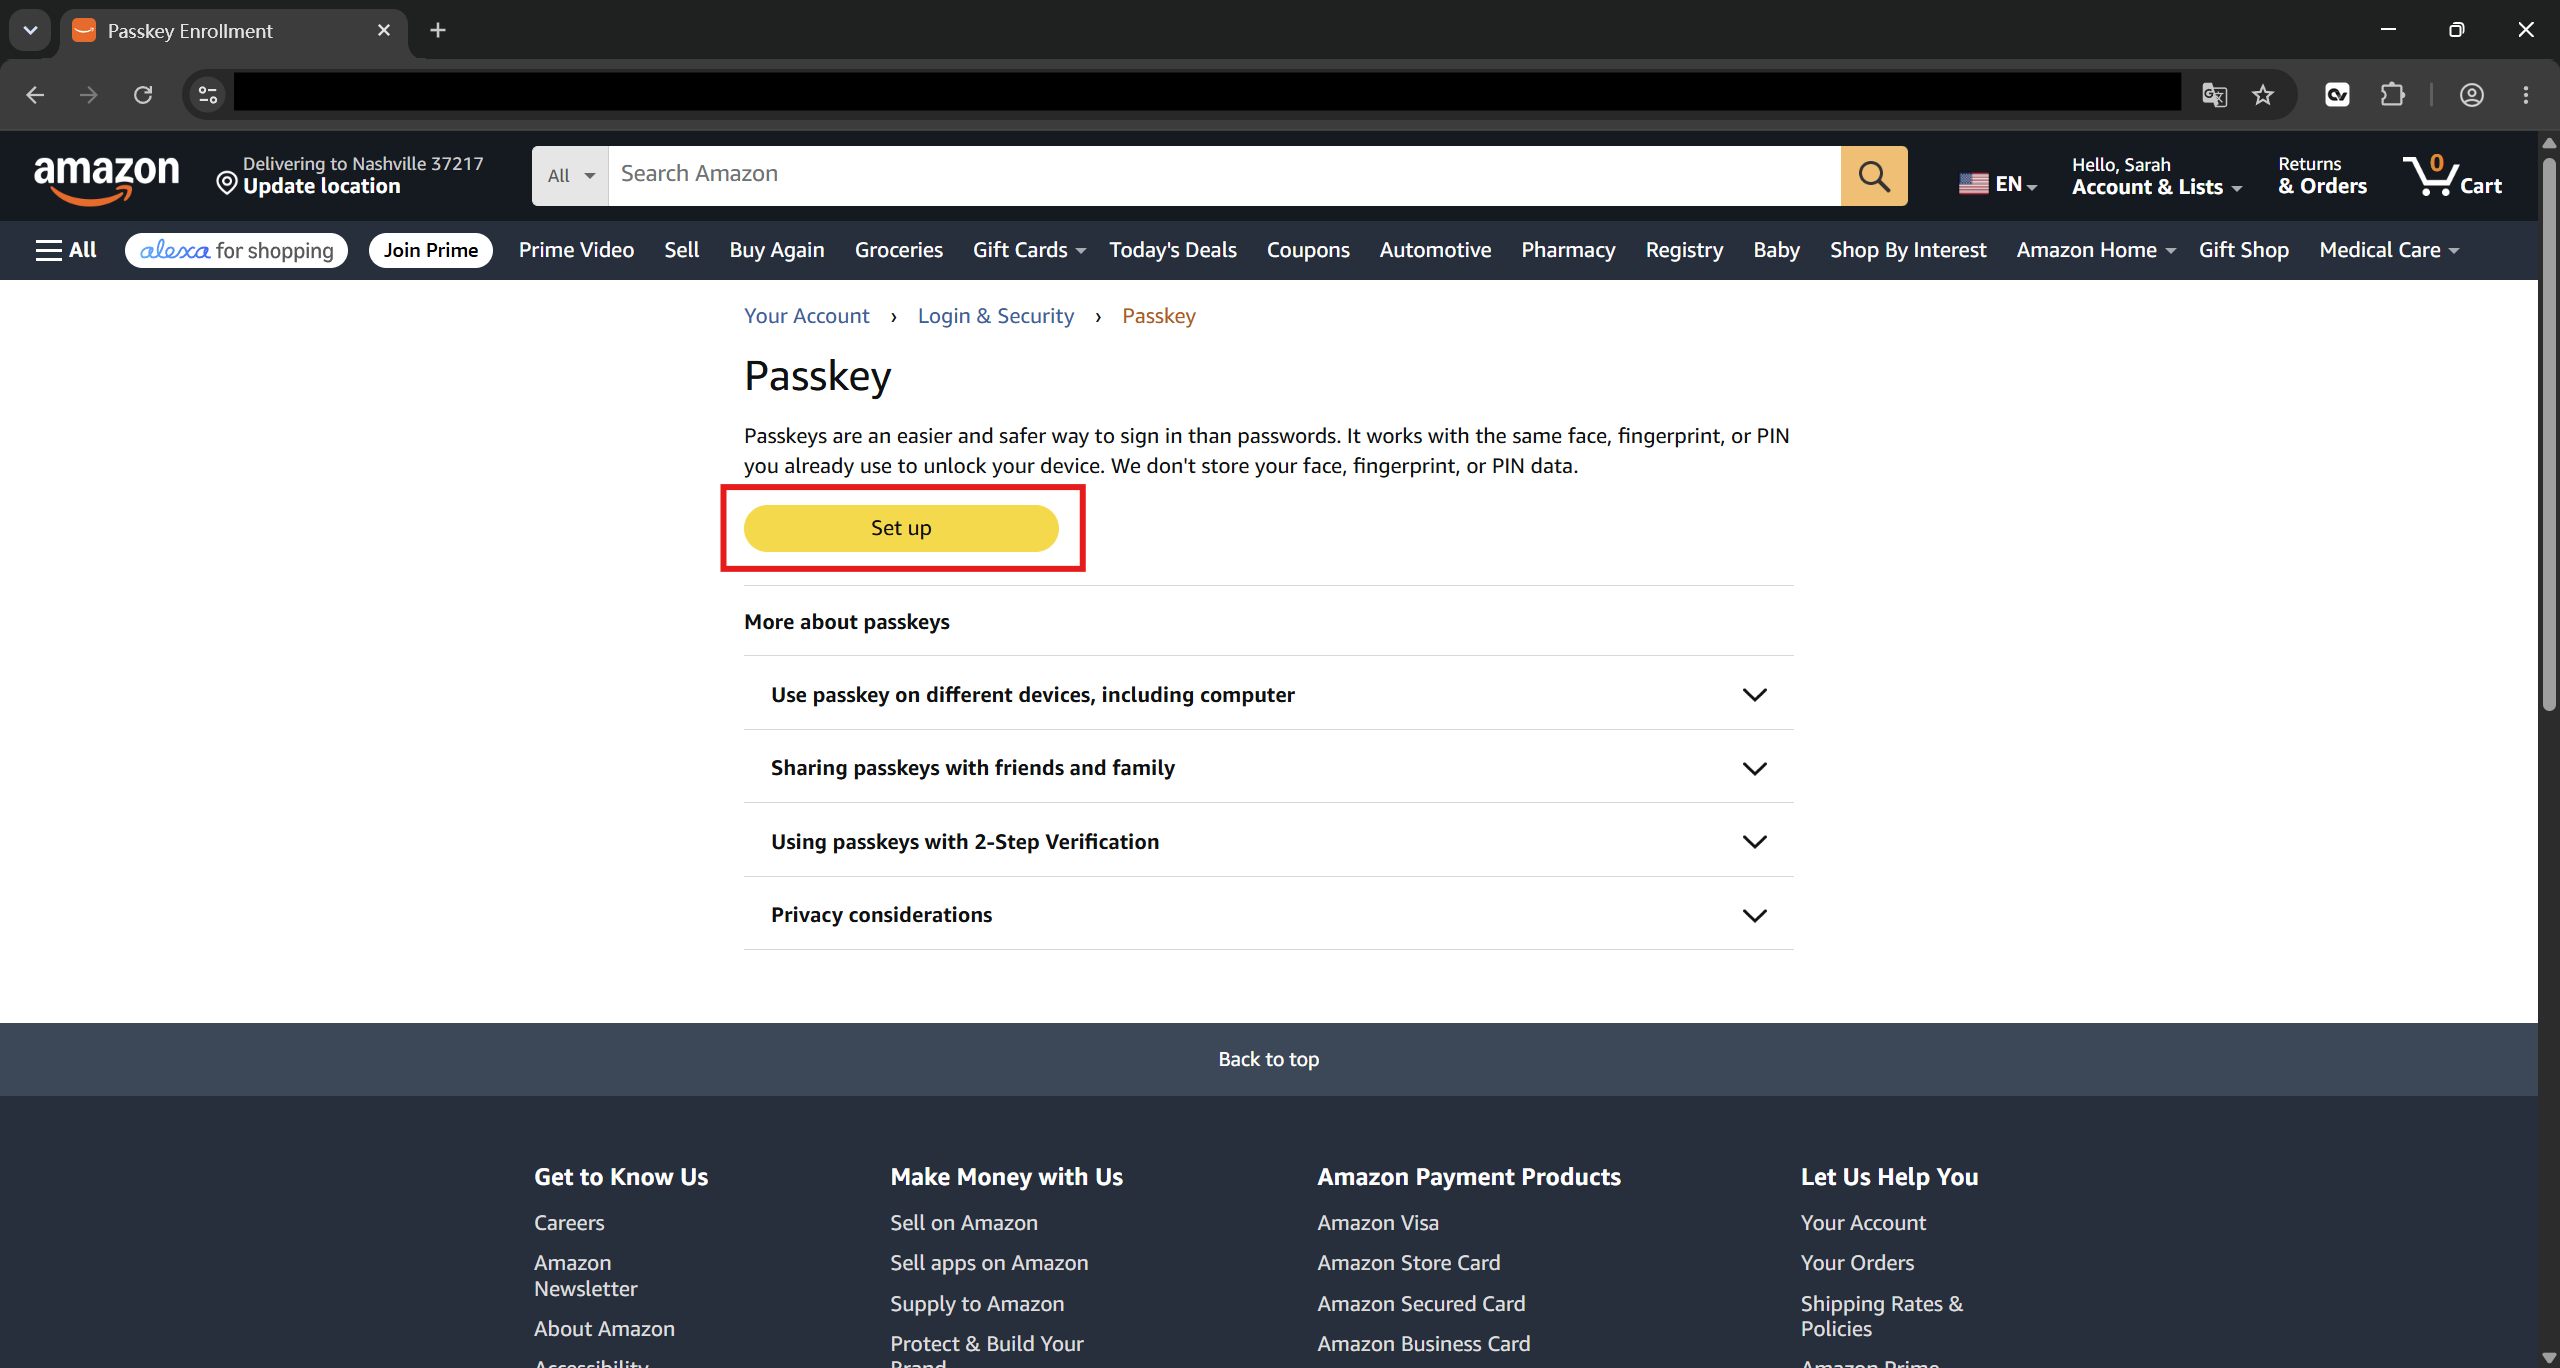
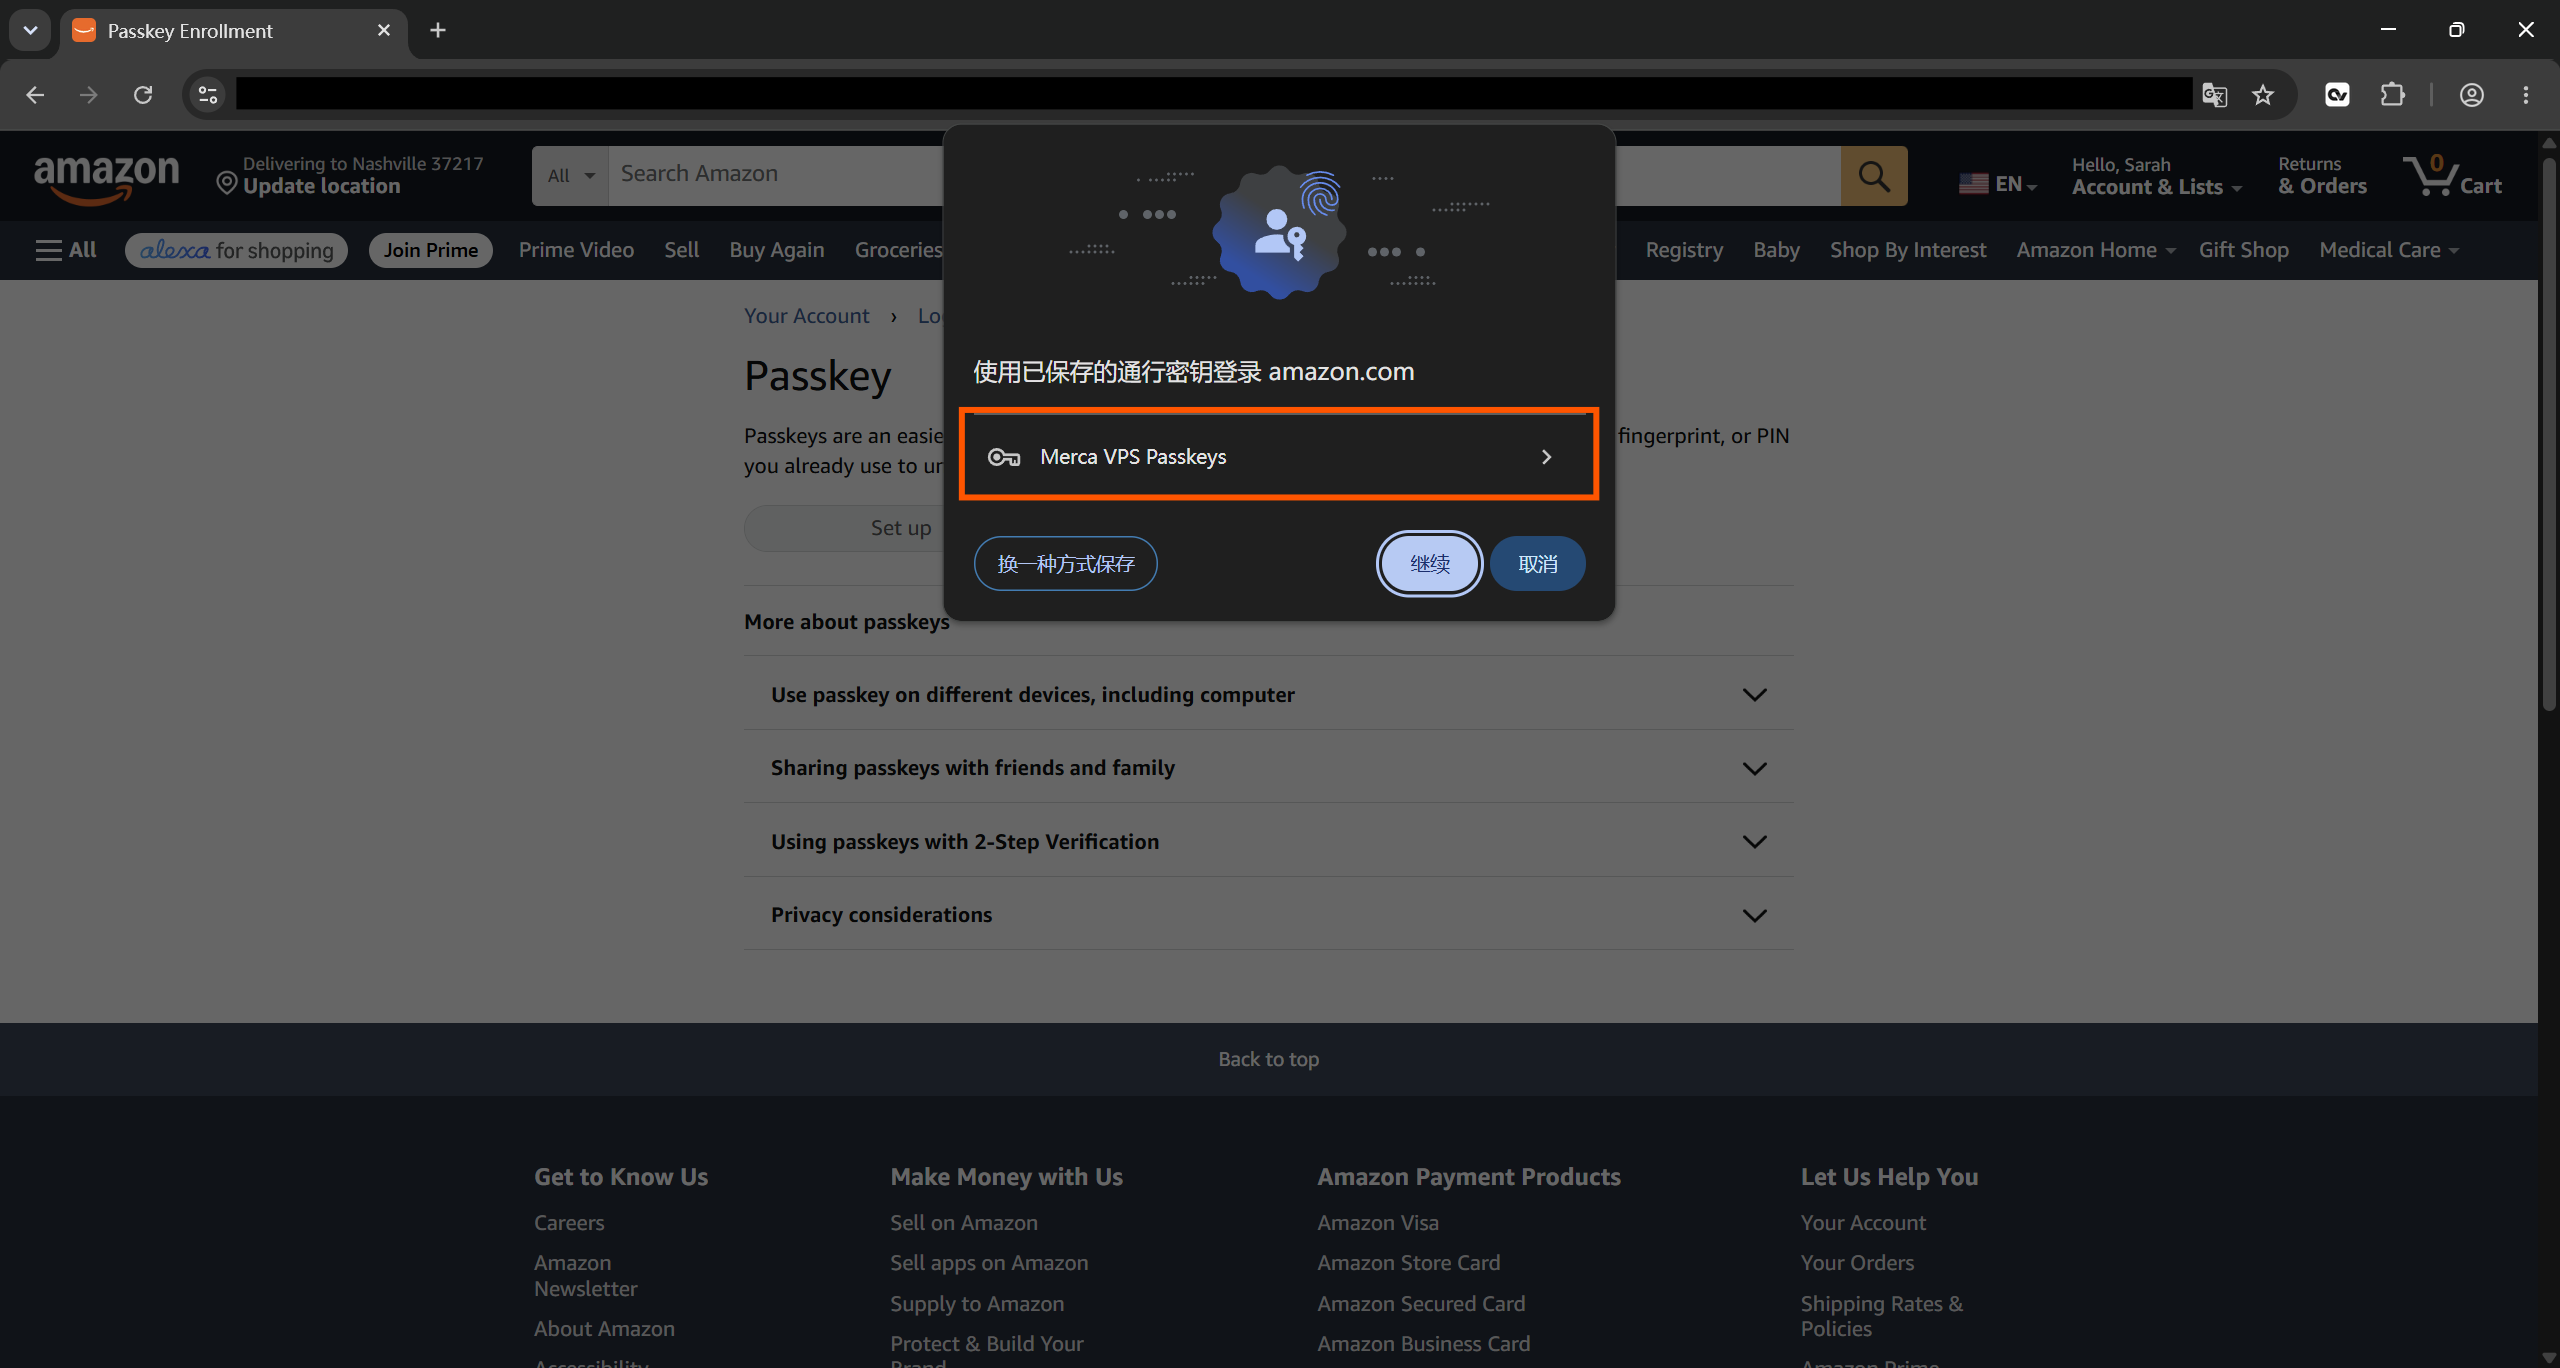
Choose Merca VPS Passkeys
- Click Set up.
- In the dialog, choose Merca VPS Passkeys.
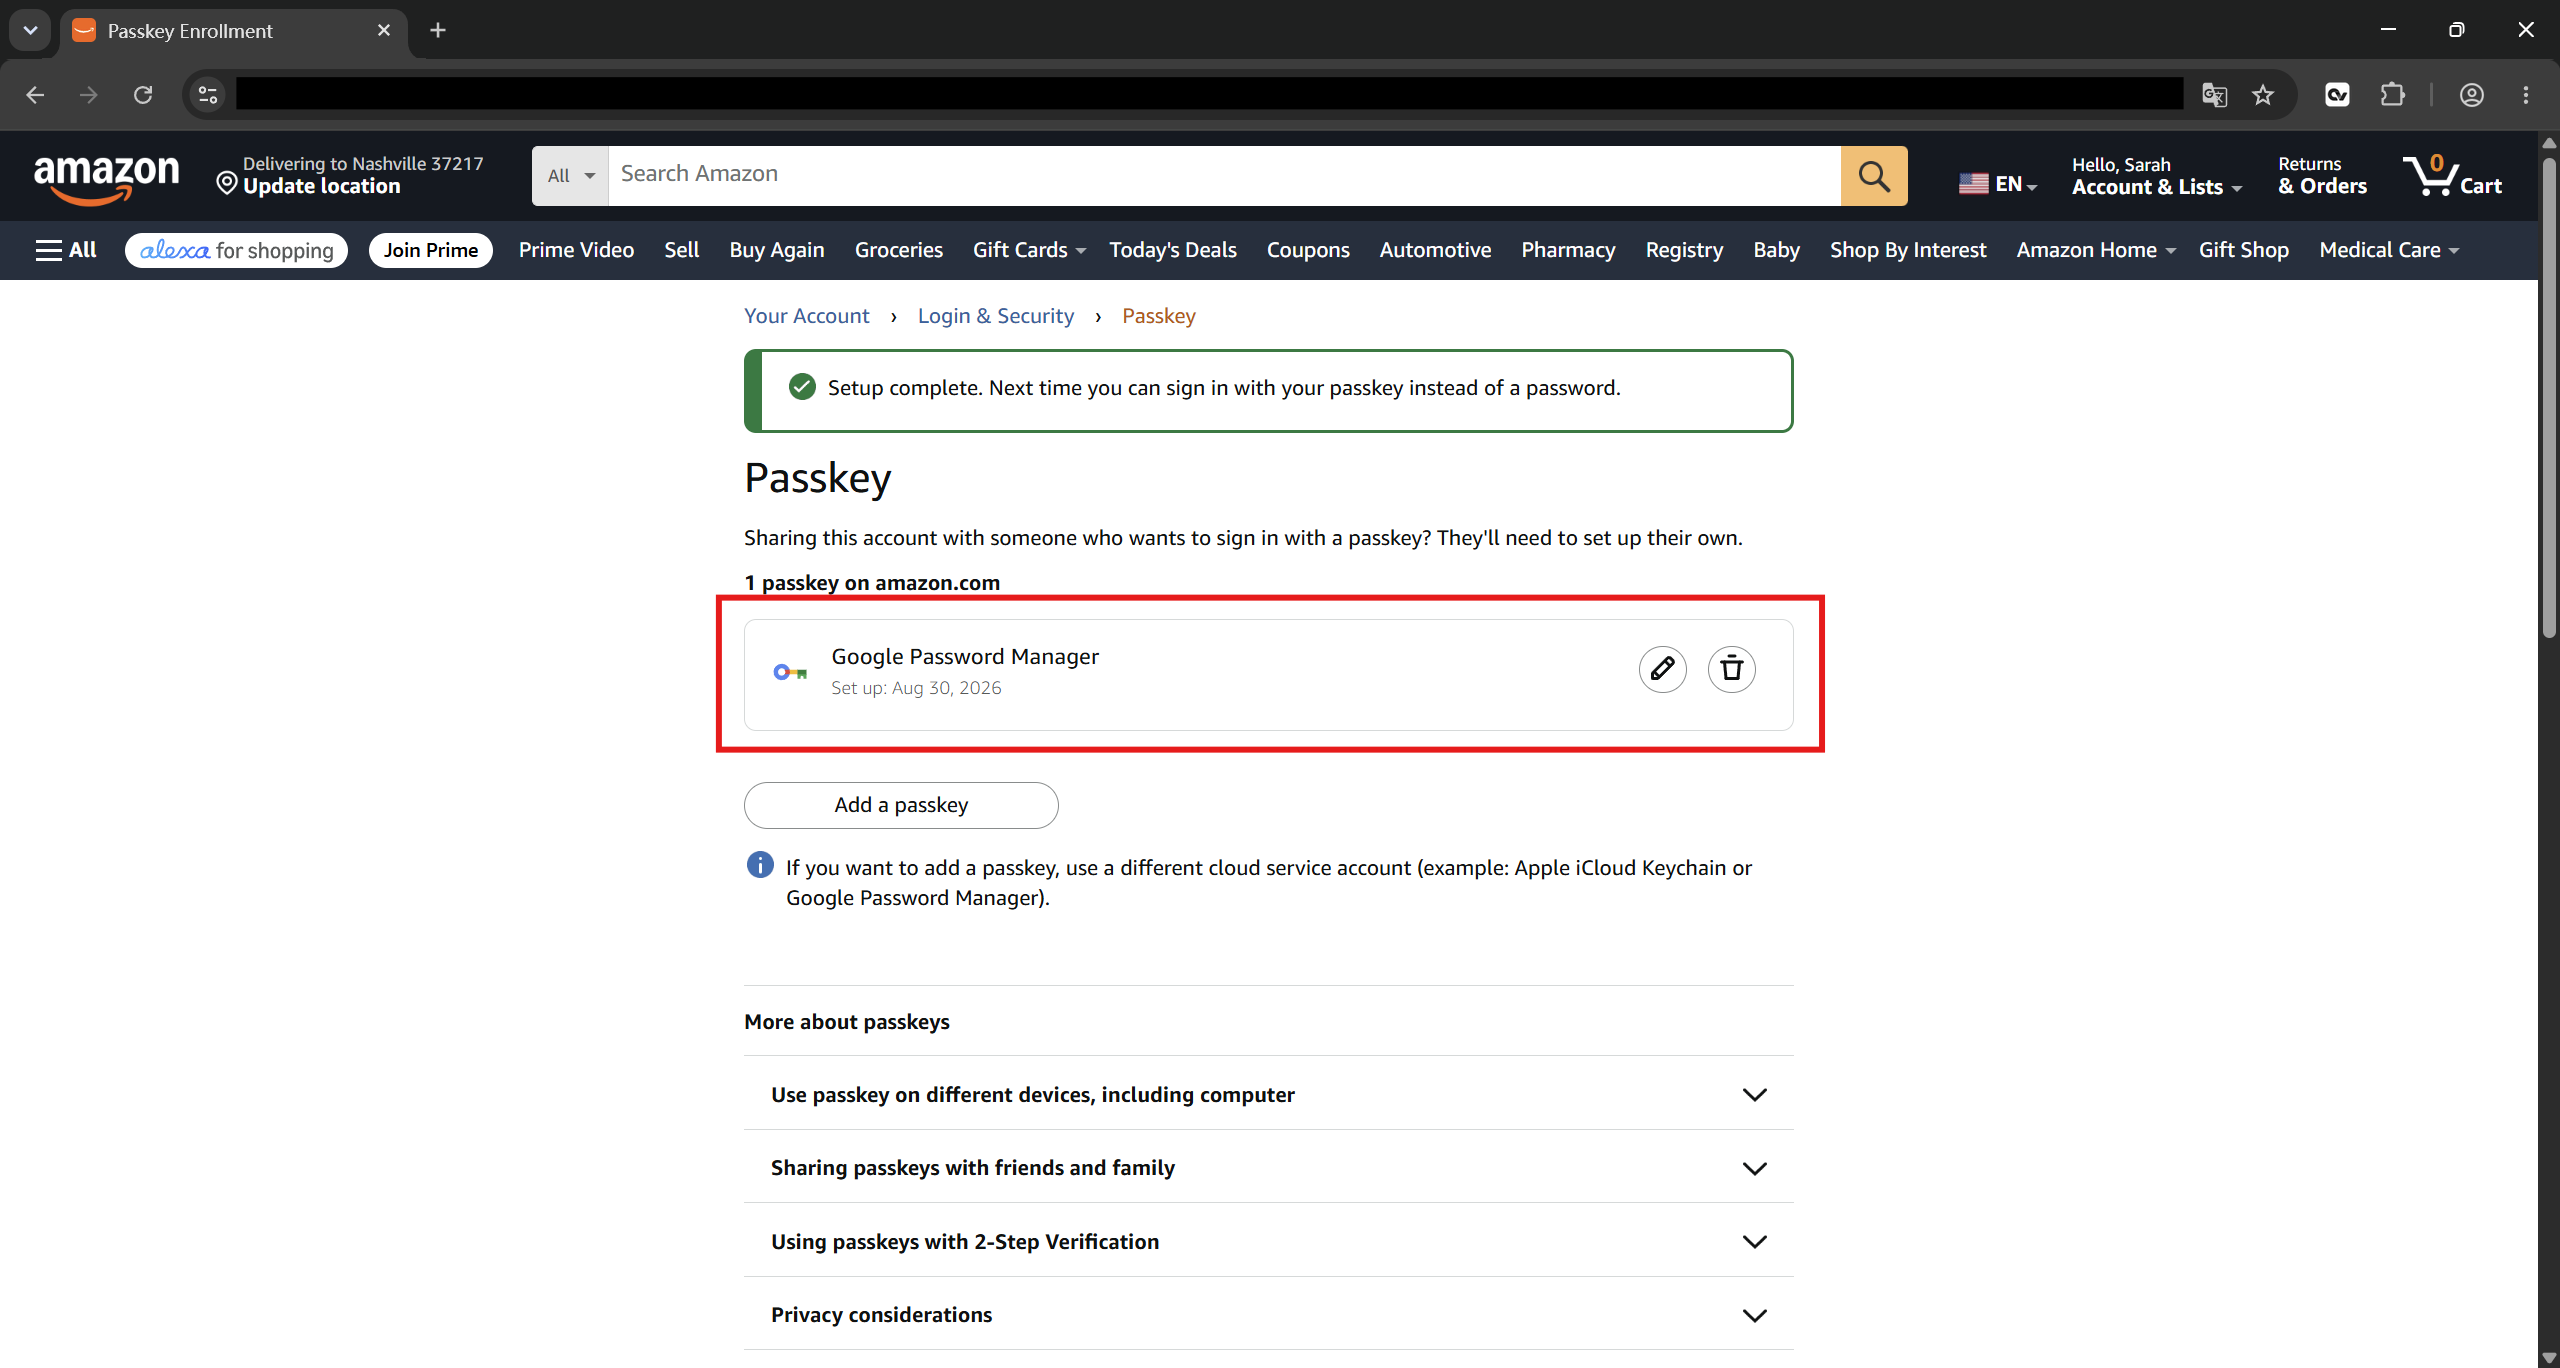
Confirm it is set up
Amazon shows that the Passkey is configured. The list may show Google Password Manager. That is the Passkey you just created.
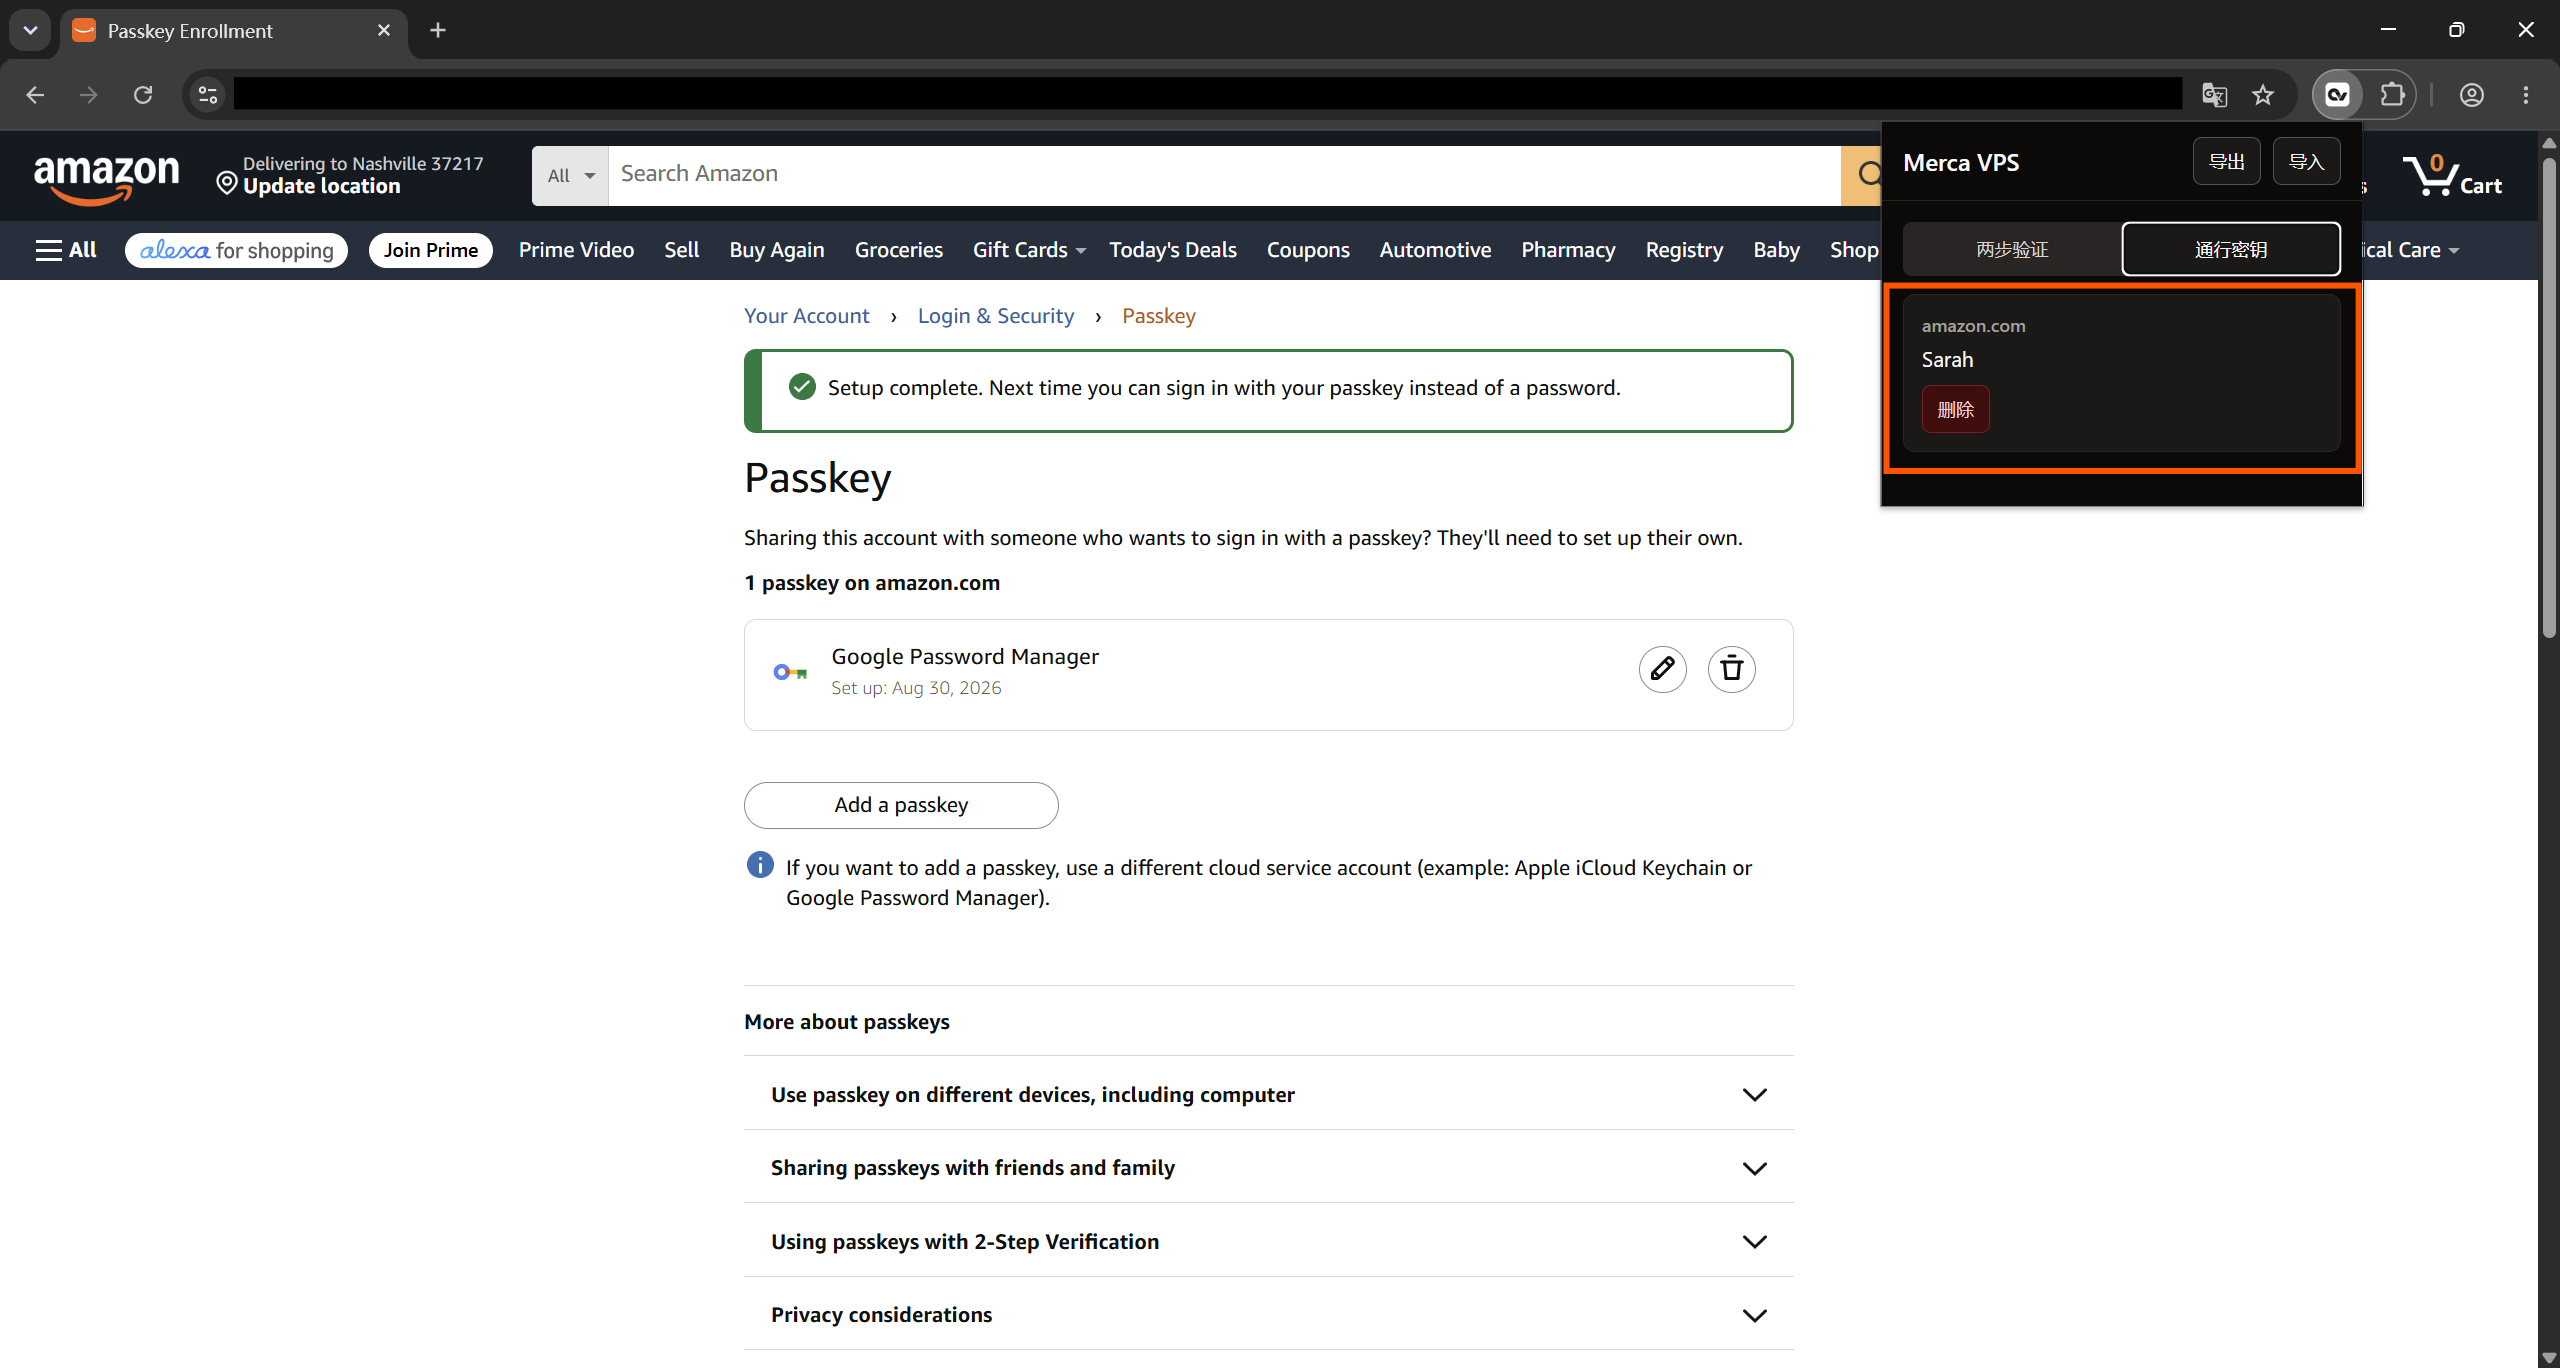
Check the extension
Click the extension icon at the top right and open Passkeys. Confirm the Amazon Passkey is listed.
Export
In the extension, click Export and save the backup file. Use it if you move to another VPS or need a backup. Keep the exported file private. Anyone who has it can use the Passkeys in it.
Sign in with the Passkey
Later, when you sign in to Amazon in Merca VPS, it may complete on its own, or a dialog may appear.
If a dialog appears, it lists the account on this Passkey (name and email). Choose that account. Do not pick a different account.
Complete this in the same Merca VPS browser. Another browser, or a VPS without the imported backup, will not have this Passkey.